Security
For: All roles
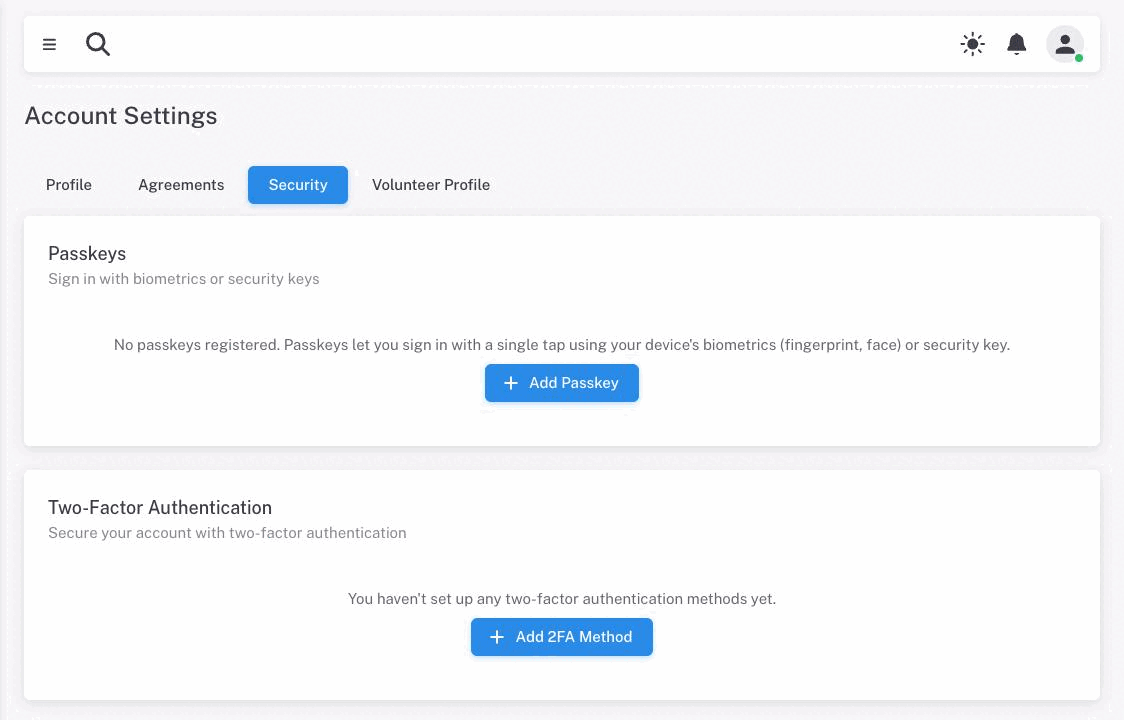
Lumieos uses passwordless authentication — there is no password to set or change. Instead, you sign in by clicking a magic link sent to your email address. The Security tab in Account Settings gives you tools to add additional verification methods: two-factor authentication (2FA) and passkeys.
If you already have 2FA configured, opening the Security tab prompts you to verify your identity before you can change anything. This protects your security settings from anyone who gets hold of an open session.
About that re-verification prompt
The prompt is headed Session Verification Required. Verifying once opens a raised-privilege window that lasts up to 8 hours, but expires after 15 minutes of inactivity — so a long gap mid-task means verifying again.
The prompt offers whichever methods you have: a code from your authenticator app, an SMS code (with a resend timer), or Verify with Passkey. If you have both an app and SMS, you can switch between them inside the dialog.
Note: Adding your first 2FA method or passkey never asks you to verify — otherwise you could never get started. Everything after that does.
A few actions require this verification but will not re-open the dialog for you if your window has lapsed — making an email primary, deleting a 2FA method, or removing a passkey may simply report a failure instead. If an action fails for no obvious reason, re-open the Security tab to verify again, then retry.
Two-Factor Authentication
Two-factor authentication adds a second step when you access sensitive pages. After signing in with your magic link, you may be asked to confirm your identity with a code from your authenticator app or a text message.
You can configure up to two 2FA methods: one authenticator app and one SMS number. Once a type is configured, it appears in the Add dialog greyed out and marked “(Already configured)”, and when you have both, the Add button is replaced by “You have configured all available 2FA methods.”
Setting Up an Authenticator App
An authenticator app generates a 6-digit code that refreshes every 30 seconds. Compatible apps include Google Authenticator, Microsoft Authenticator, and Authy.
- On the Security tab, click Add 2FA Method.
- Select Authenticator App and click Add Method.
- Scan the QR code displayed with your authenticator app.
- Enter the 6-digit code shown in your app and click Verify.
Your authenticator app method is active once the code is verified successfully.
Setting Up SMS Verification
SMS verification sends a one-time code to your mobile phone.
- On the Security tab, click Add 2FA Method.
- Select SMS Verification.
- Enter your phone number with country code (for example,
+12025551234). - Click Add Method. A verification code is sent to your phone.
- Enter the code and click Verify.
Removing a 2FA Method
Click the trash icon next to any configured method to remove it. Removing all 2FA methods disables two-factor authentication for your account.
Passkeys
Passkeys let you sign in or verify your identity using your device’s built-in security features — such as Face ID, Touch ID, Windows Hello, or a hardware security key — without entering any code.
You can register up to 3 passkeys on your account. The section tells you where you stand — “You have 2 of 3 passkeys registered.” Once you reach three, the Add Passkey button disappears; remove one to make room.
Note: A passkey’s name is set when you create it and cannot be changed afterwards. To rename one, delete it and register it again.
Registering a Passkey
- On the Security tab, find the Passkeys section.
- Click Add Passkey.
- Enter a name to identify this passkey (for example, “MacBook Pro” or “iPhone”).
- Click Register Passkey.
- Your browser will prompt you to verify with your device (fingerprint, face scan, PIN, or security key). Follow the on-screen instructions to complete registration.
The passkey is immediately usable after registration.
Removing a Passkey
Click the trash icon next to any registered passkey to remove it. If you lose a device, remove its passkey from this page to prevent it from being used to access your account.
Browser Compatibility
Passkeys require a modern browser with WebAuthn support. If your browser does not support passkeys, a message will appear on the Security tab and the passkey section will be unavailable. Updating to a current version of Chrome, Safari, Firefox, or Edge will add support.