Finding & Registering for Events
For: Coaches, Team Admins
This page covers how to find events available to your team and how to complete the registration process.
Browsing Events
The events listing is available from the main navigation. It shows all events for the current season, grouped by month. Each event card displays:
- Event name and program badge (e.g., FLL Challenge, FTC)
- Date and city of the event
- Number of registered teams
- Status badge — indicating the current registration state (see below)
- Program and season logos when available
- A View Details button linking to the event’s public page
By default, the list shows upcoming and current-season events. An Include archived toggle lets you browse past seasons. When viewing archived events, they are grouped by season year rather than by month.
Event Status Badges
Each event card shows a status that tells you where the event currently is in its lifecycle:
| Status | What it means |
|---|---|
| Registration Not Open | Registration is configured but not yet available |
| Preference Selection | You can submit event preferences (ranked-choice) but registration has not opened yet |
| Registration Open | Your team can register now |
| Registration Closed | No new registrations are being accepted |
| Advancement Required | Only teams advancing from a previous event can register |
| Event Starting Soon | The event begins shortly; proceed to check-in |
| Teams Checking-In | The event is in progress at the check-in phase |
| Matches/Judging in Progress | Robot matches and judging are underway |
| Judges Deliberating | Judges are reviewing performances |
| Awards Presentation | The awards ceremony is happening |
| Event Canceled | This event will not take place |
Event Details Page
Clicking View Details on an event card opens the event’s public page. From here you can view:
- Details tab — Date, venue address, description, logistics information, agenda (if posted), links and downloads
- Teams tab — The list of registered teams with team numbers, names, cities, and organization names
- Schedules tab — Match and judging schedules (visible once the event is active and schedules have been posted)
- Scores and Awards tab — Robot game rankings and award results (visible on event day and after)
- Volunteers tab — Volunteer sign-up information (shown only when volunteer roles are configured for the event)
Registration Requirements
Before your team can register for an event, the following conditions must be met:
Team Status Must Be “Good”
Your team must have a Good status in Lumieos. This means all required compliance steps have been completed — invitations accepted, forms submitted, and any outstanding items on your Action Items resolved.
If your team’s status is not Good, the registration system will reject the submission with a “requirements not met” response. You can check your status and outstanding tasks from the team management dashboard.
Some event levels have a bypass setting that allows teams with non-Good status to register anyway. This is configured by region administrators and will not appear in these docs — contact your region if you believe this applies to your team.
Geographic Eligibility
Event levels may be restricted to teams in certain cities or counties. If your team’s location does not match the configured restrictions for a level, that level’s events will not appear as available to you. These restrictions are set by region administrators and are not visible to teams.
No Conflicting Registrations
Lumieos prevents duplicate registrations for the same event. If your team is already registered (at any status, including cancelled) for an event, you cannot register again. Additionally, if a level does not allow multiple registrations, registering for one event in that level will remove other events in that level from your available options.
Some levels are also configured to be mutually exclusive with other levels — registering at one level may prevent registration at another. This is determined by region administrators.
Payment
Many levels require payment either before or after registration. See Payments & Commerce for details. In short:
- Pre-registration payment mode: Your team must have a completed payment on file before the registration will be accepted. If you attempt to register without paying, the flow will show a Pay Now prompt and block submission until payment is complete.
- Post-registration payment mode: Your team registers first, then payment is invoiced afterward. After your registration is confirmed, your event card on the Events tab will remind you that payment is still due.
The Registration Flow
Event registration and preference submission start from your team’s Events tab and open a dedicated, full-page registration screen. Your team header stays visible at the top throughout.
Step 1: Check Your Team Status
Go to your team’s management page and review the Action Items on your dashboard. Resolve any outstanding items until your status shows as Good. See Team Status & Compliance for more detail.
Step 2: Open the Events Tab
Navigate to your team’s management page and select the Events tab. If registration or preference selection is currently open for any level available to your team, you will see one or both of the following action buttons:
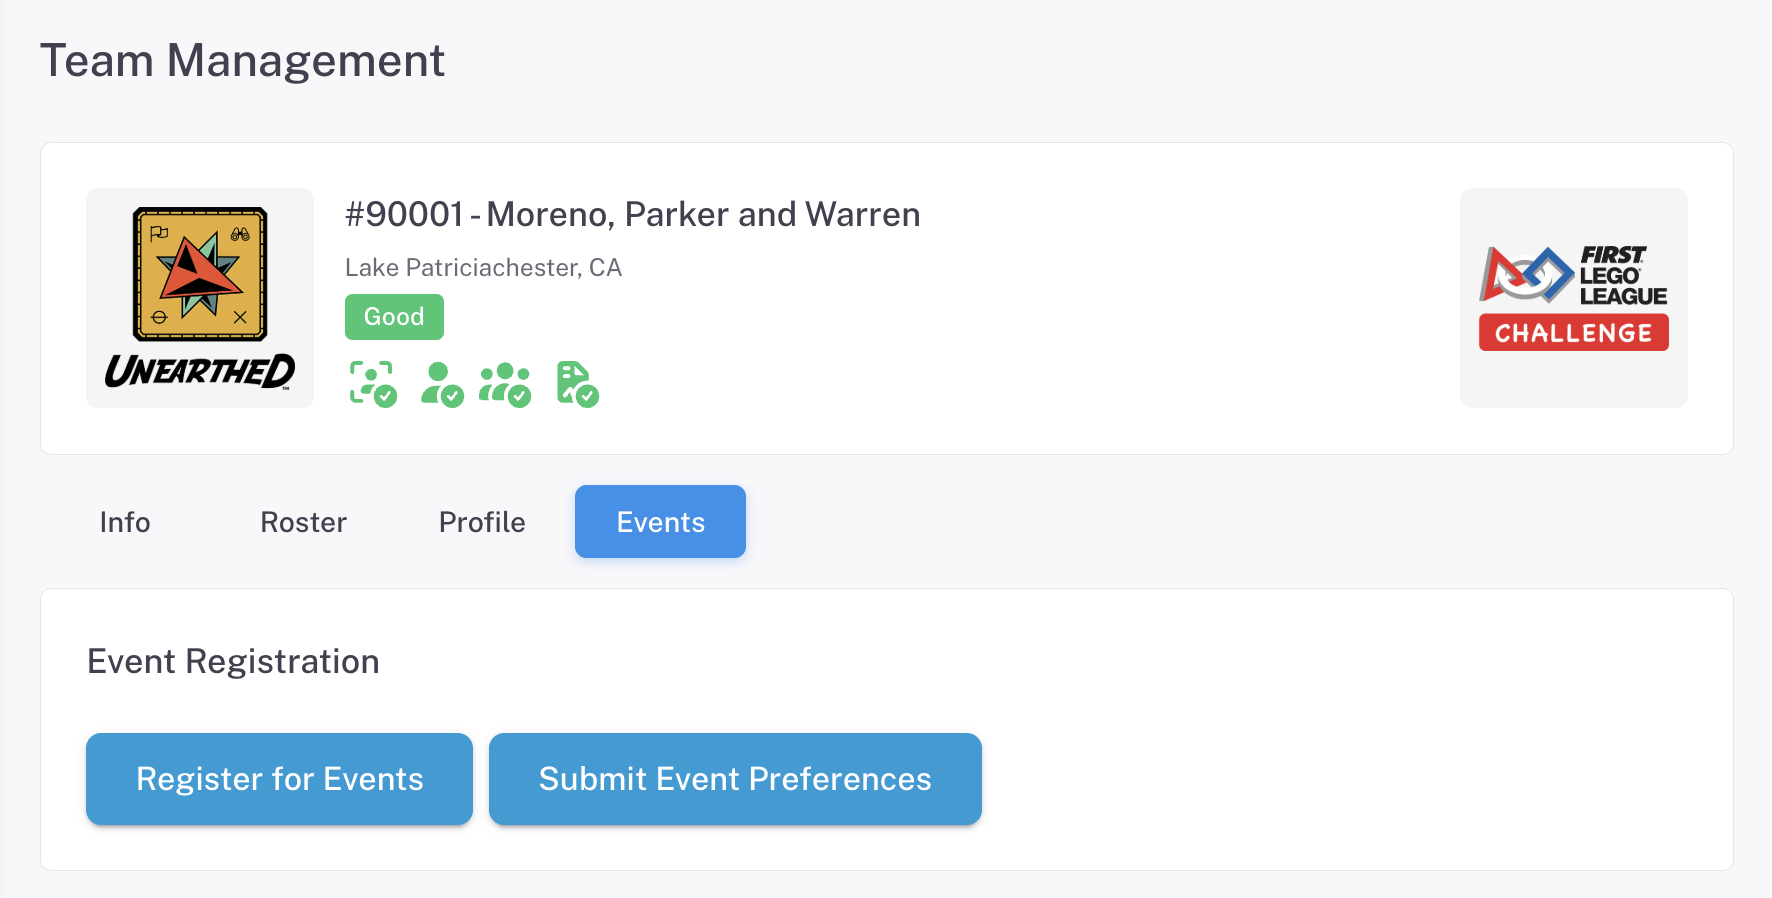
- Register for Events — shown when open/direct registration is active for at least one level
- Submit Event Preferences — shown when a preference wave is open for at least one level; appears muted (“Edit your event preferences”) once you have already submitted preferences for all open waves
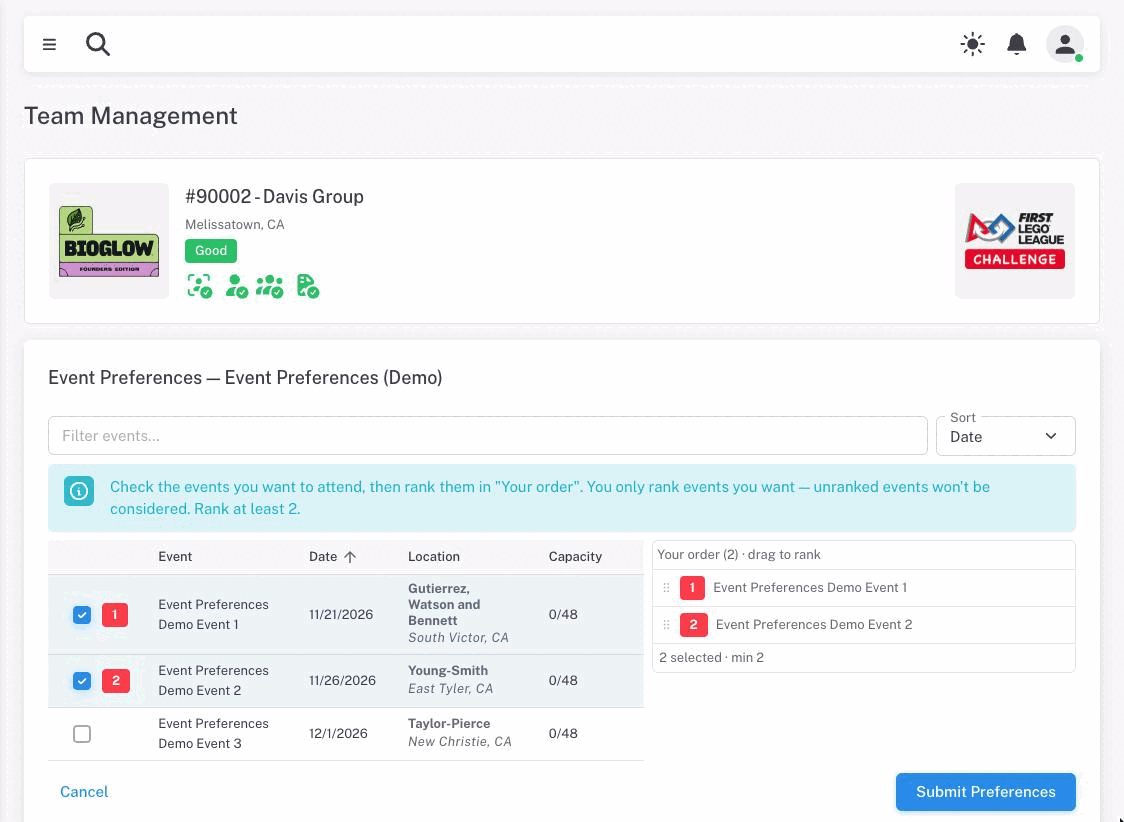
If neither button is shown, no registration or preference window is currently open for your team.
Step 3: Choose a Level (if applicable)
If more than one level is available, a short level-selection dialog appears so you can choose which tier to register for (or submit preferences for) — each option shows relevant details such as wave close times and whether you have already submitted preferences. If only one level is available, this step is skipped and you go straight to the registration screen.
Step 4: Select and Rank Your Events
The registration screen lists every event you are eligible to register for, with these columns:
- A checkbox to include the event
- Event name
- Date
- Location — the venue name (in bold) with its city and state below it
- Capacity — registered teams versus the event’s maximum
Only events your team can actually register for are shown. You only need to rank the events you actually want to attend — unranked events are not submitted and will not be considered.
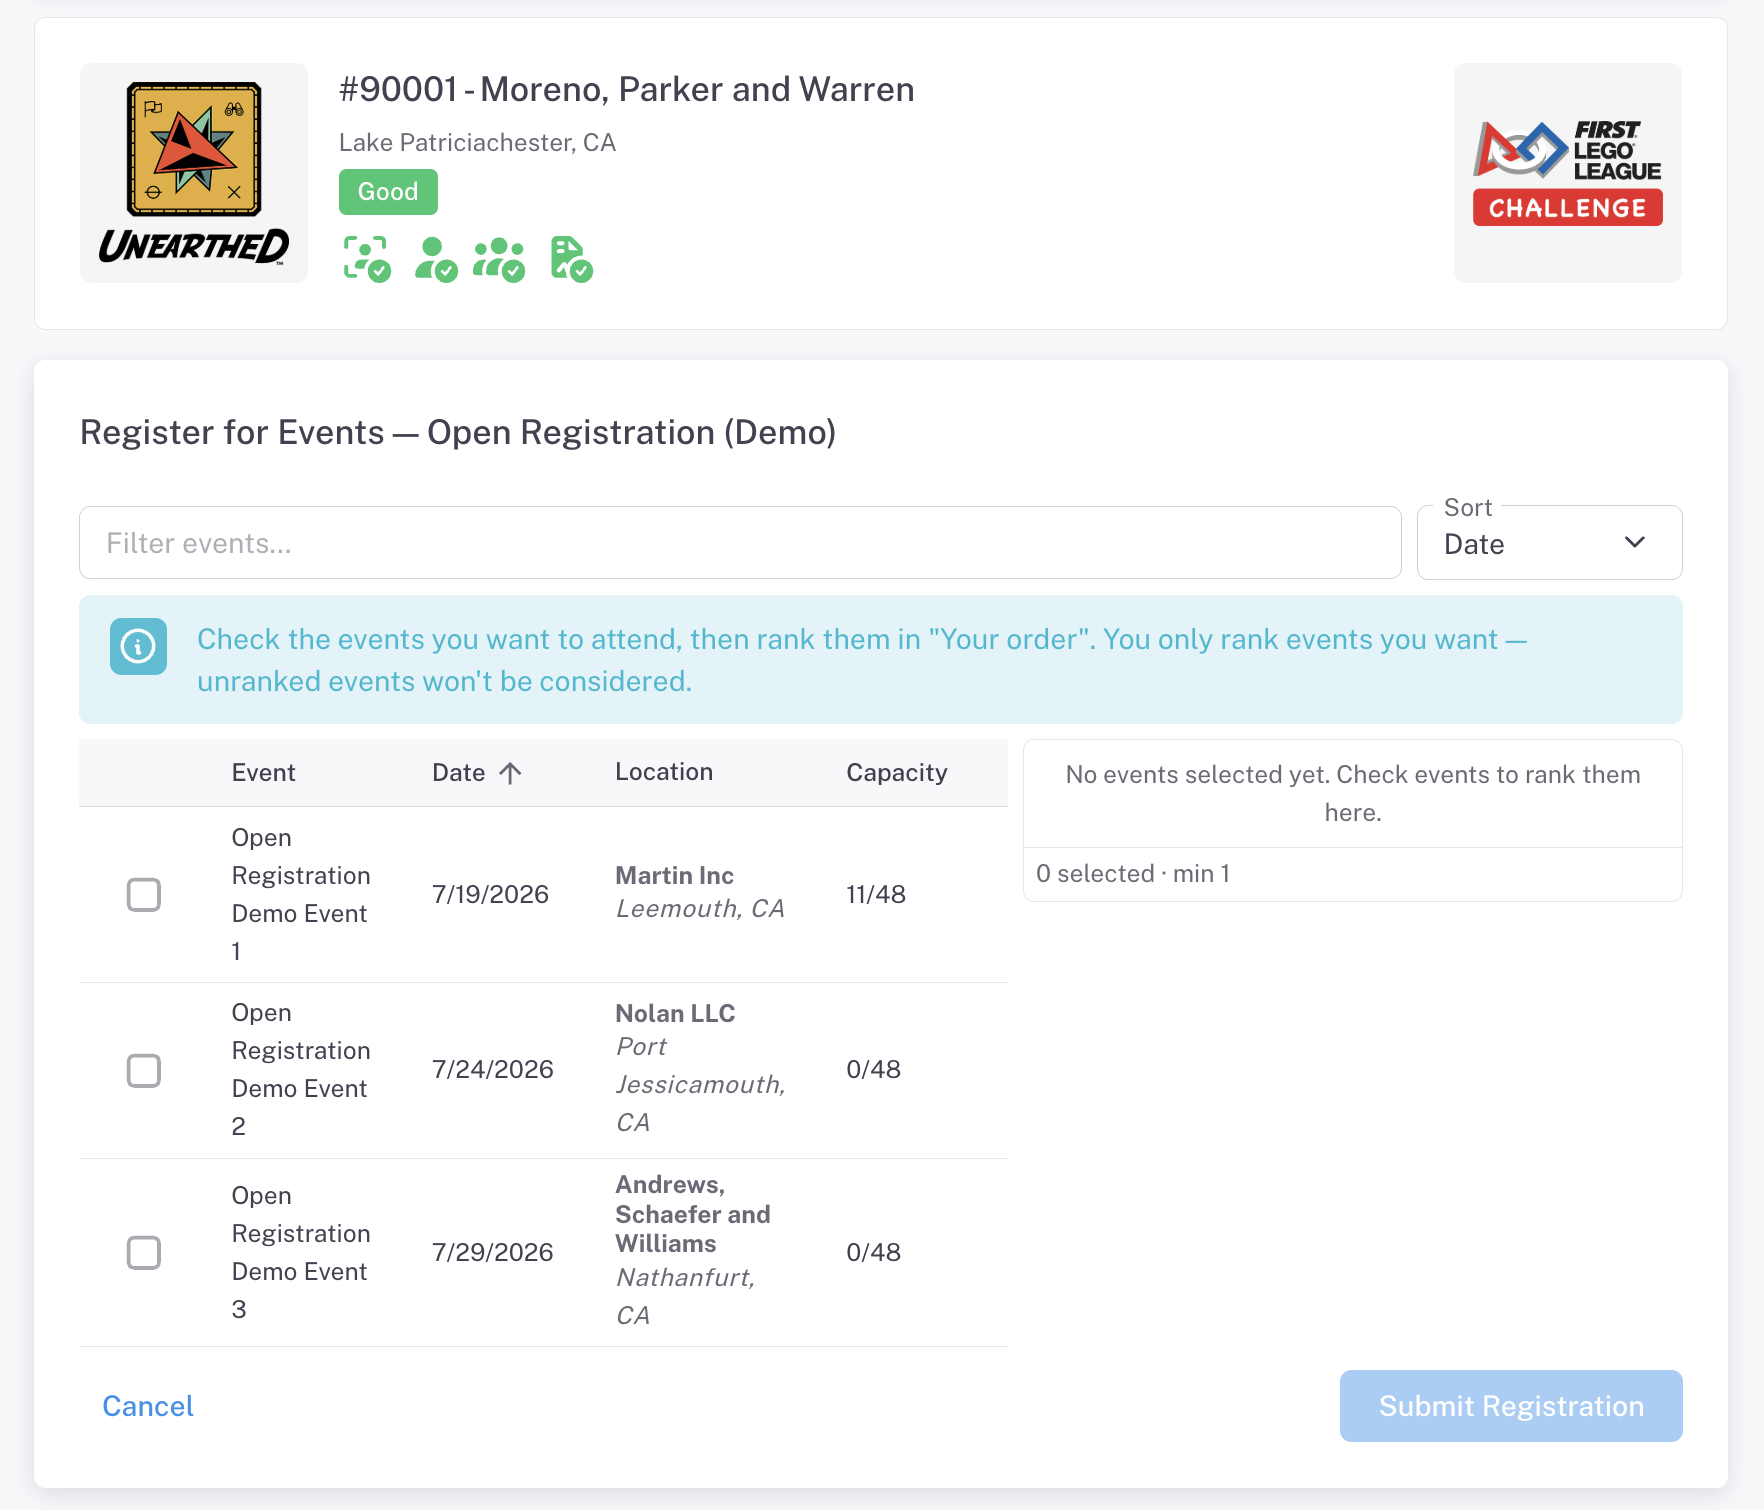
To build your ranking:
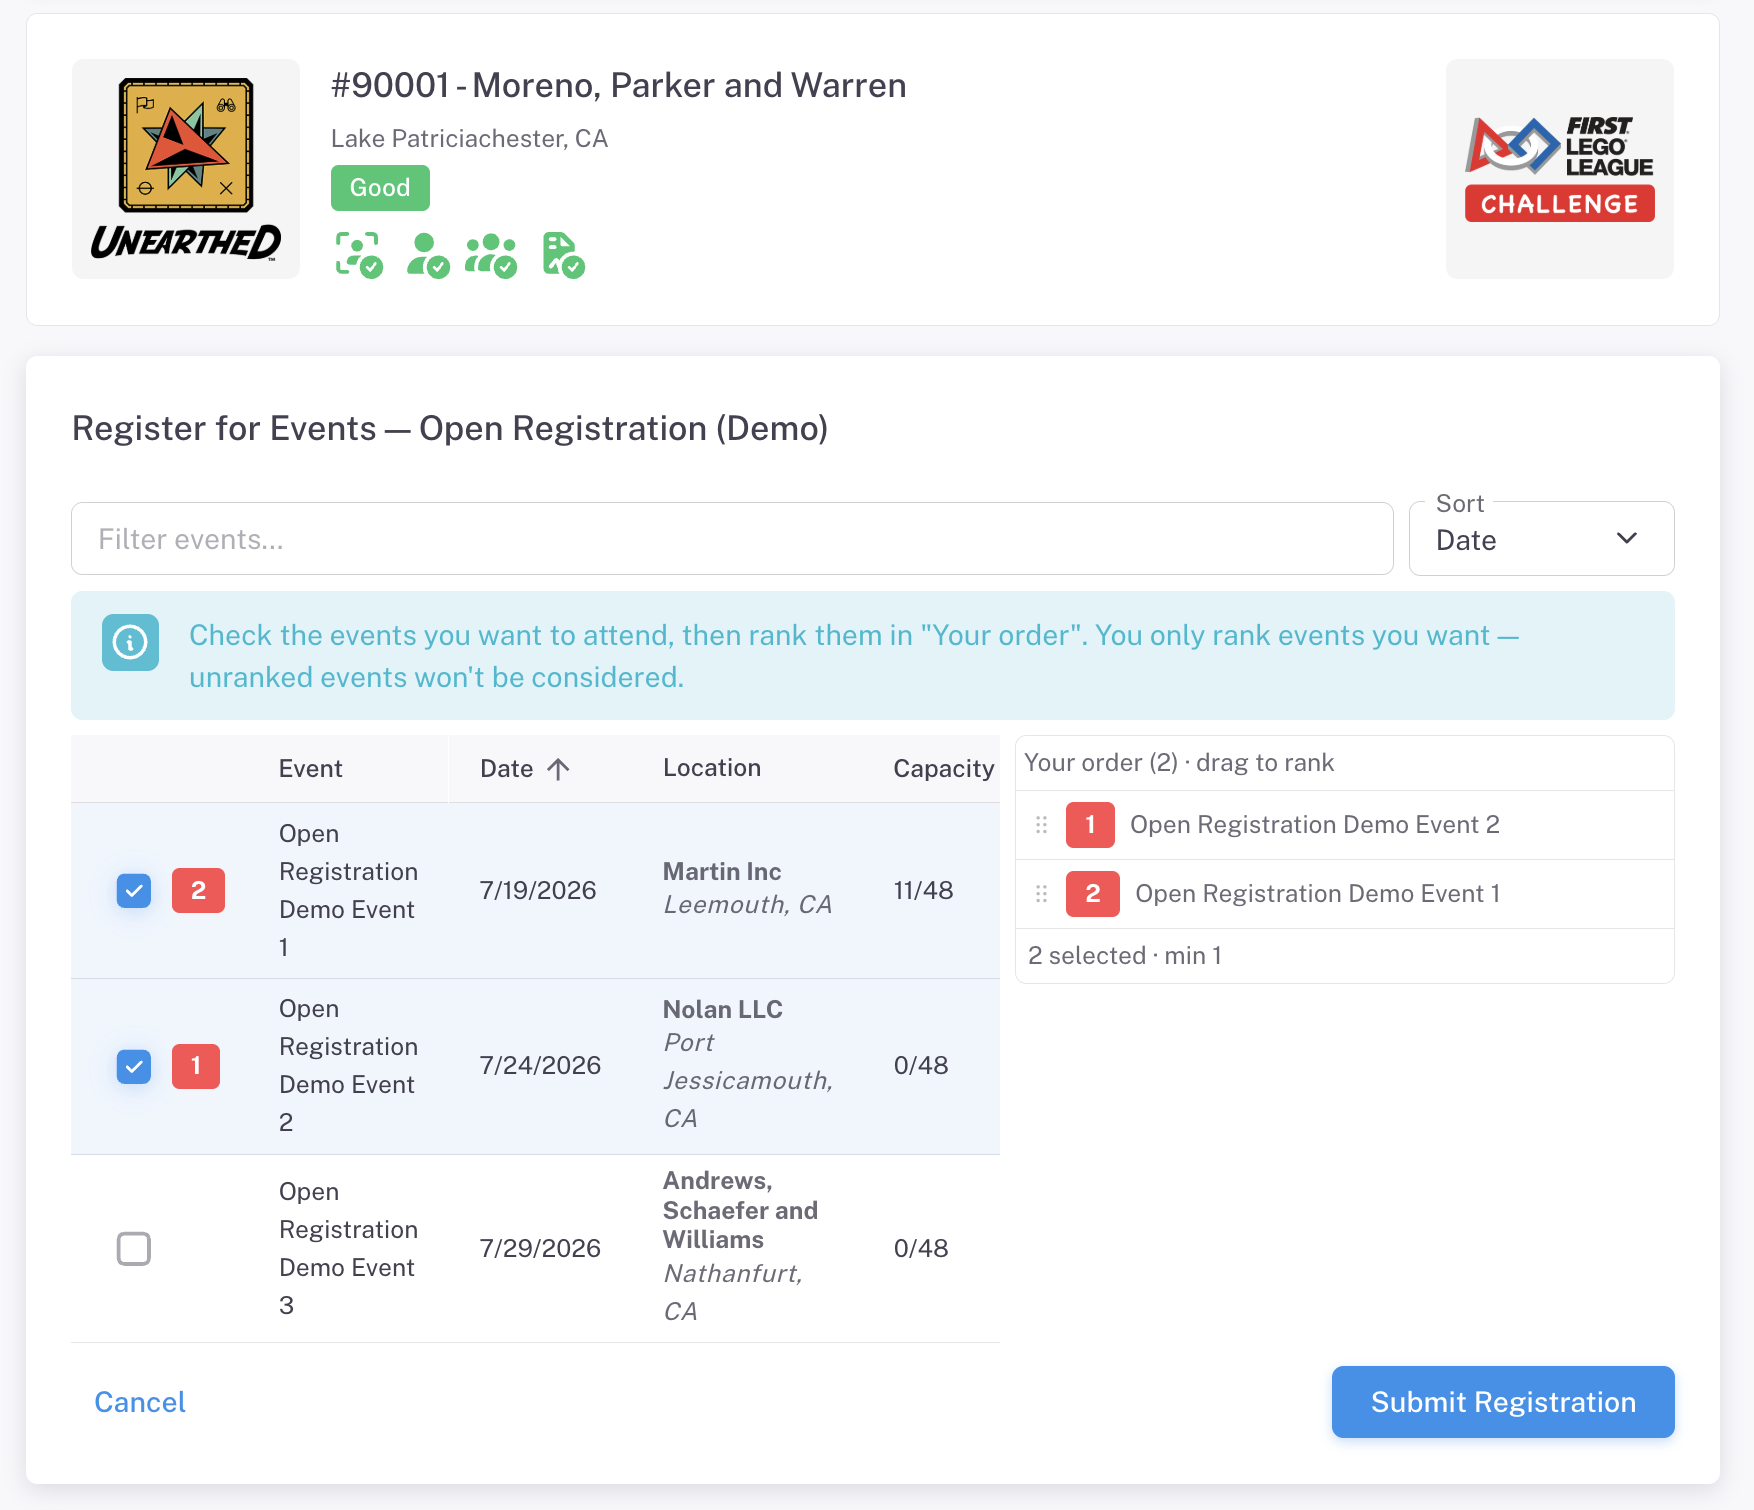
- Check an event (or click its row) to add it. It is assigned the next rank (1, 2, 3, …), shown as a red badge, and appears in the “Your order” panel.
- Uncheck it to remove it; the remaining events are renumbered automatically.
- In the “Your order” panel, drag entries to reorder them, or use the up / down controls. This is where you set priority — you never have to reorder the full list.
- Use the Filter box and Sort control to find events quickly when a level has many.
The count beneath the panel shows how many events you have selected and the minimum your region requires.
On smaller screens the same flow stacks vertically: a collapsible “Your order” summary sits above a scrollable list of event cards.
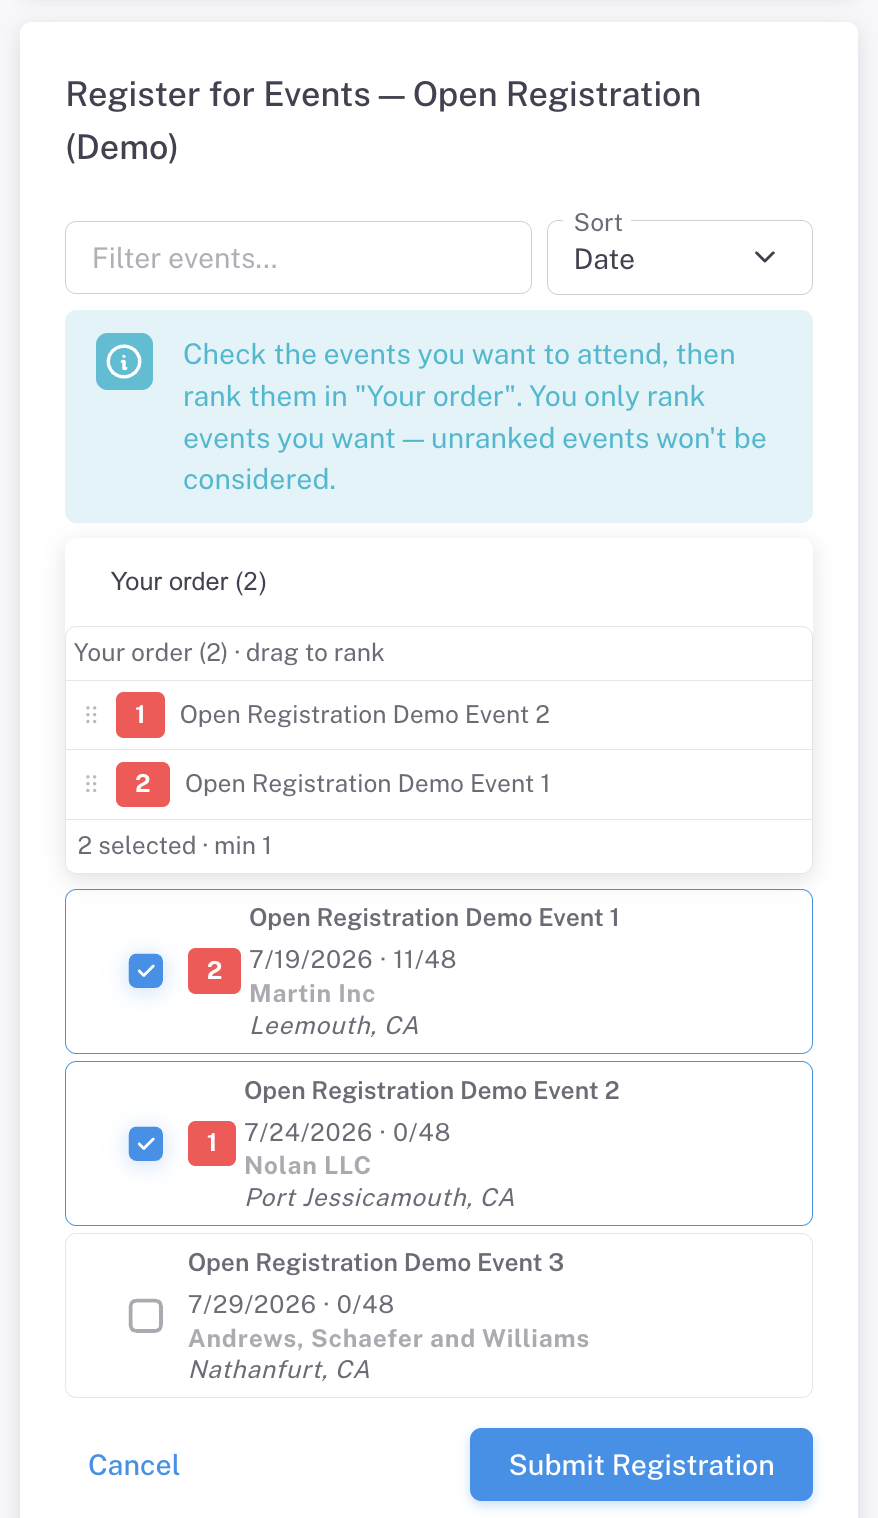
Tips on ranking:
- Ranking only one event is valid, but if that event fills up you will not be assigned anywhere else. Ranking several events in priority order gives you the best chance of placement.
- Order matters — the system tries to place your team in your top choice first, then works down the list.
- For preference waves, the wave is processed at a set time; you will be notified of the outcome afterward.
Reserved Spots
If your region has reserved a spot for your team at an event, that event is highlighted and shows a Reserved chip. A single reserved spot is automatically placed at position 1 so you keep it by default.
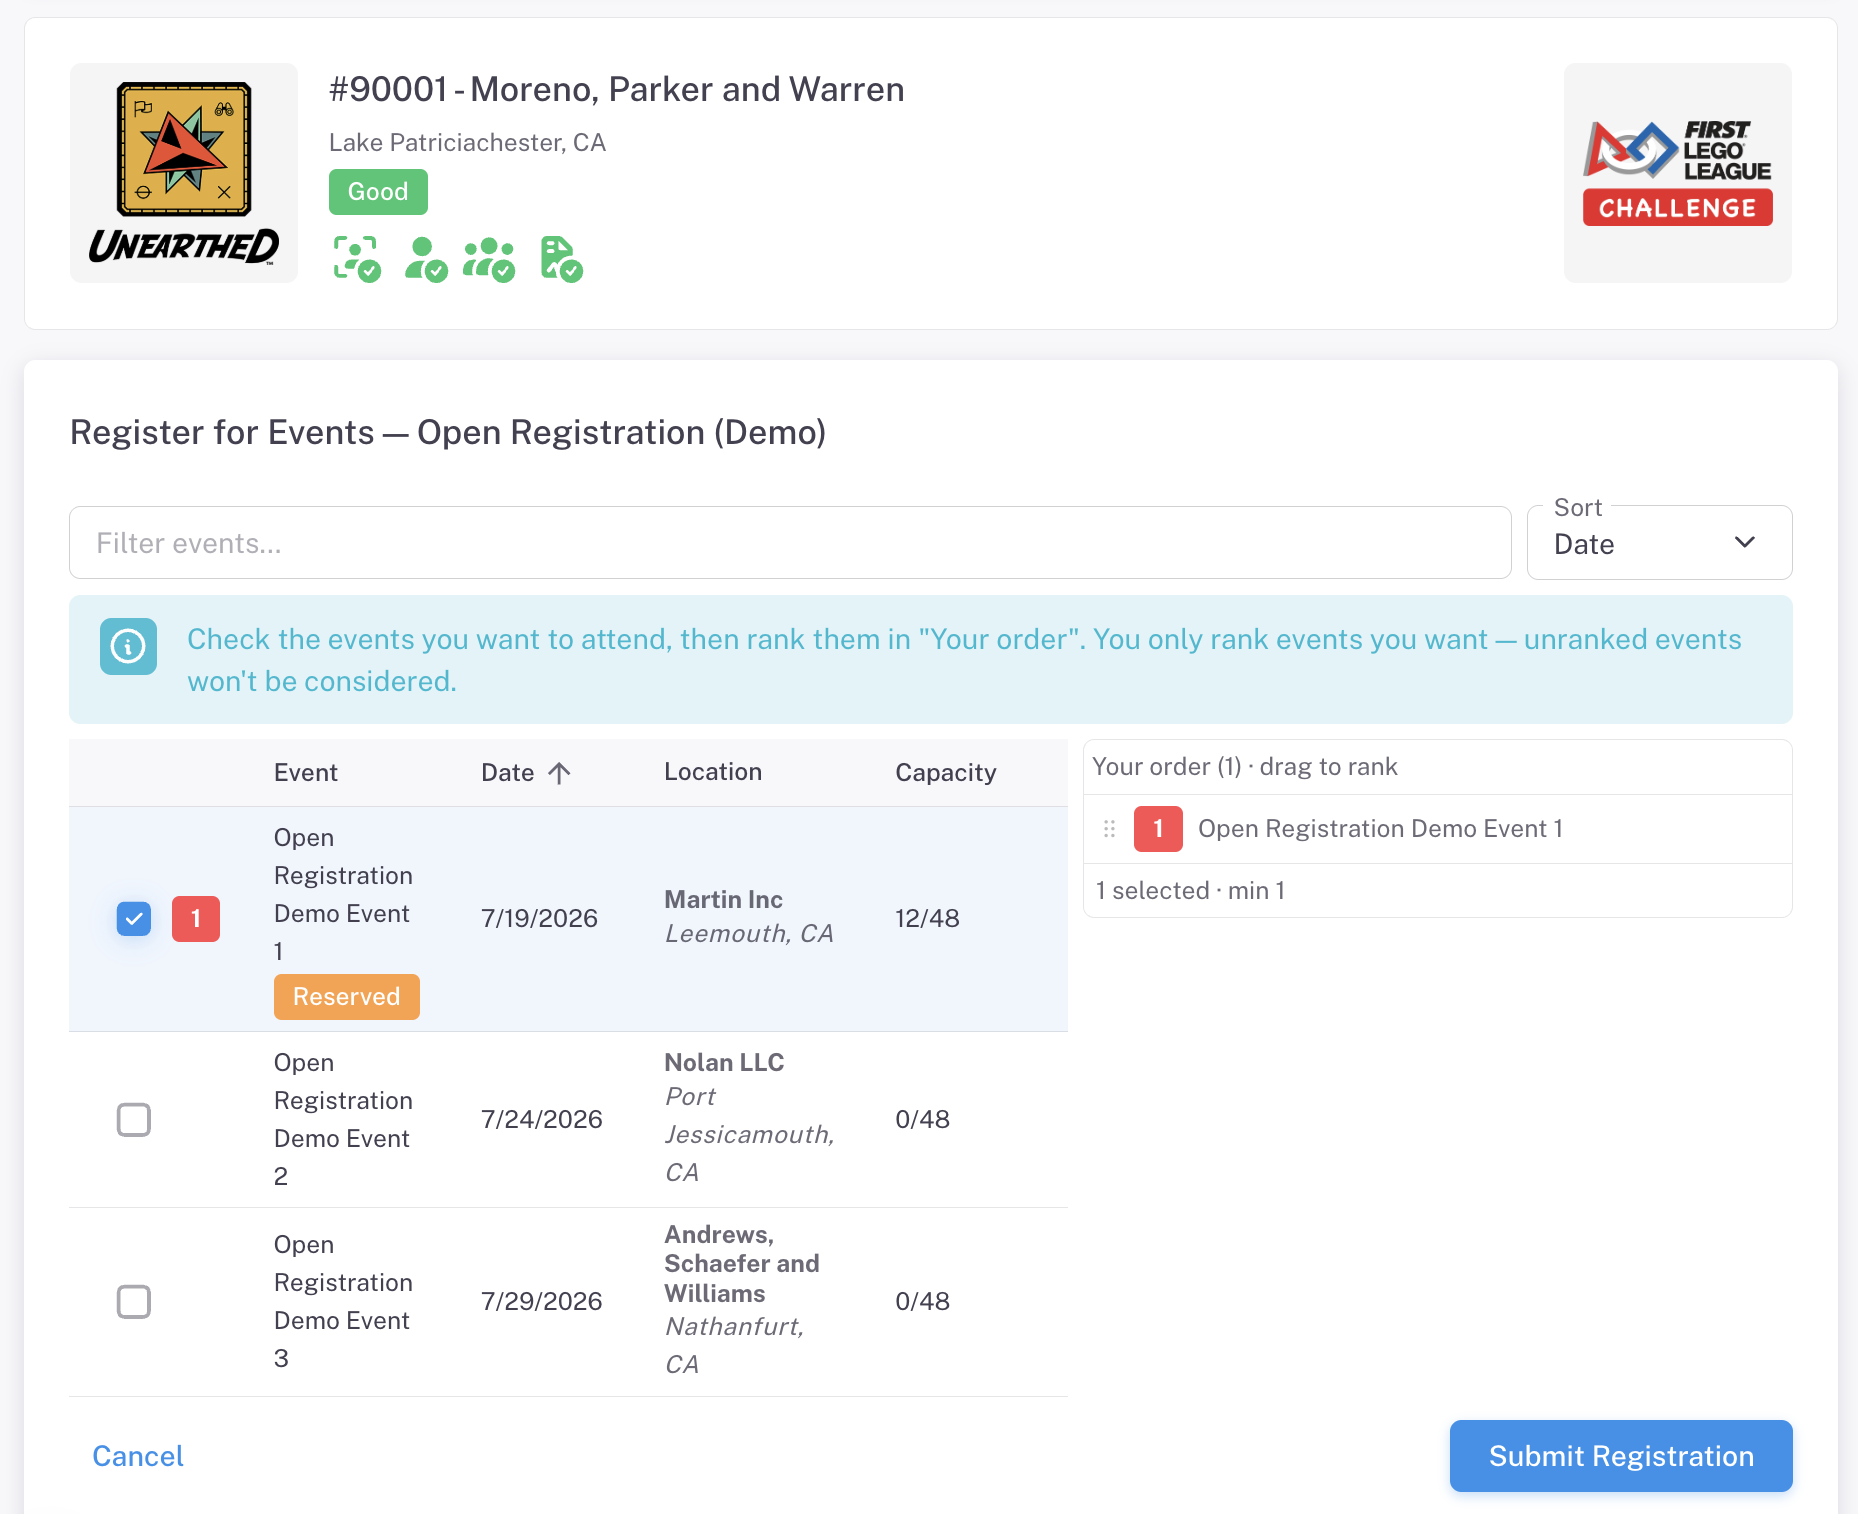
A reserved spot is only guaranteed while it is ranked #1. If you move it down — or rank another event above it — a warning appears, because registering for a higher choice can take your team out of the reserved spot:
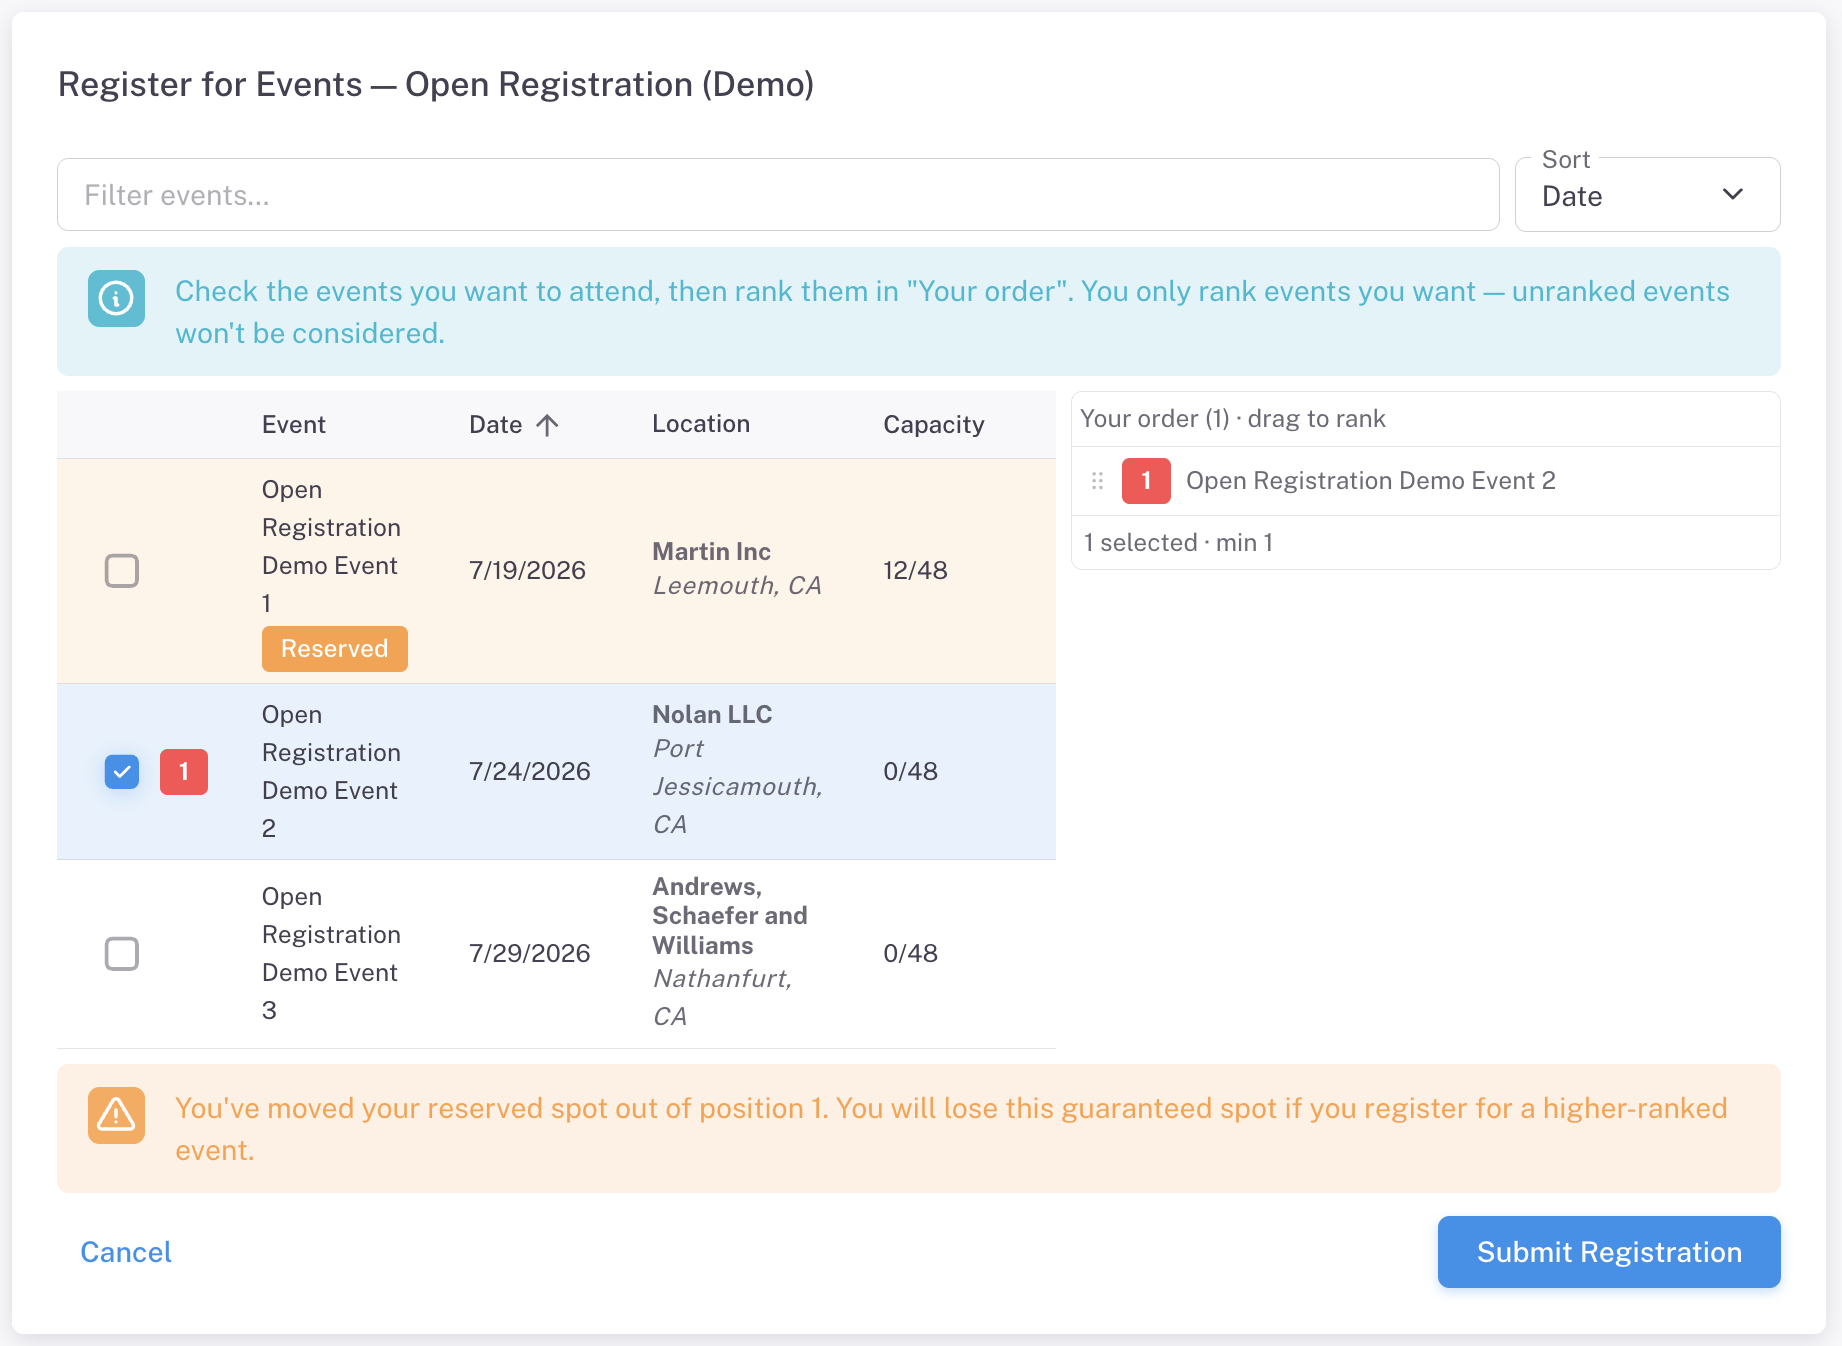
Step 5: Eligibility and Payment
Before you can submit, the screen reflects your eligibility:
- Payment required (pre-registration mode): If your level requires payment before registering and your team does not yet have a completed payment on file, submission is blocked with a clear message and a Pay Now button. Pay Now takes you straight to the invoice when only one level needs payment; if several levels are payable, it shows a short selection (with the level you came from pre-checked) before creating the invoice. Note that completing payment does not by itself register your team — the invoice can be paid by anyone with its link (a parent, for example), so once payment is complete, return to the Events tab and start the flow again to submit.
- Payment due after registration: If the level collects payment after registration, you can submit immediately; payment is invoiced afterward.
- No blockers: the Submit button is enabled.
Step 6: Confirm and Submit
When you submit, a confirmation dialog summarizes the events you are committing to — in priority order — along with the registration agreement and any active warnings (such as a reserved spot not ranked first). Review it and choose I Agree to the Above to proceed.
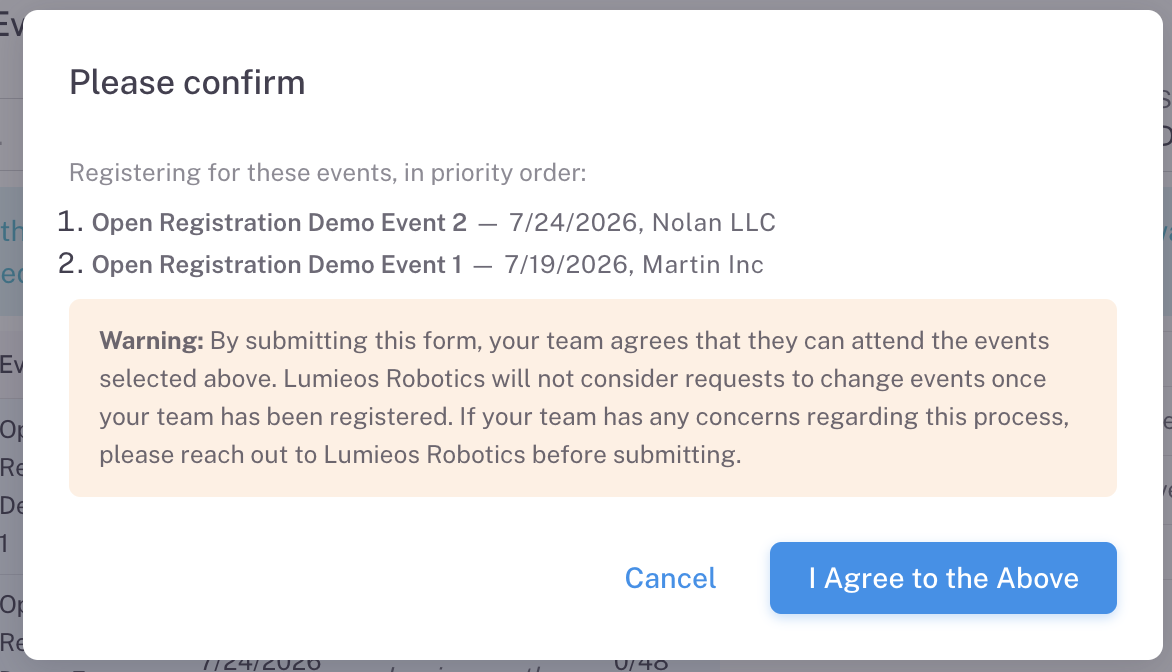
Step 7: Wait for the Outcome
After you confirm, the registration is processed and the screen shows a live status update. Possible outcomes:
| Outcome | What it means |
|---|---|
| Confirmed | Your team is registered. The event appears on your Events tab. |
| Failed | A blocking condition was detected (e.g., the event closed during processing). The message explains the reason — correct the issue and try again. |
When a level collects payment after registration, the confirmation screen reminds you that payment is still due and offers a Pay Now button.
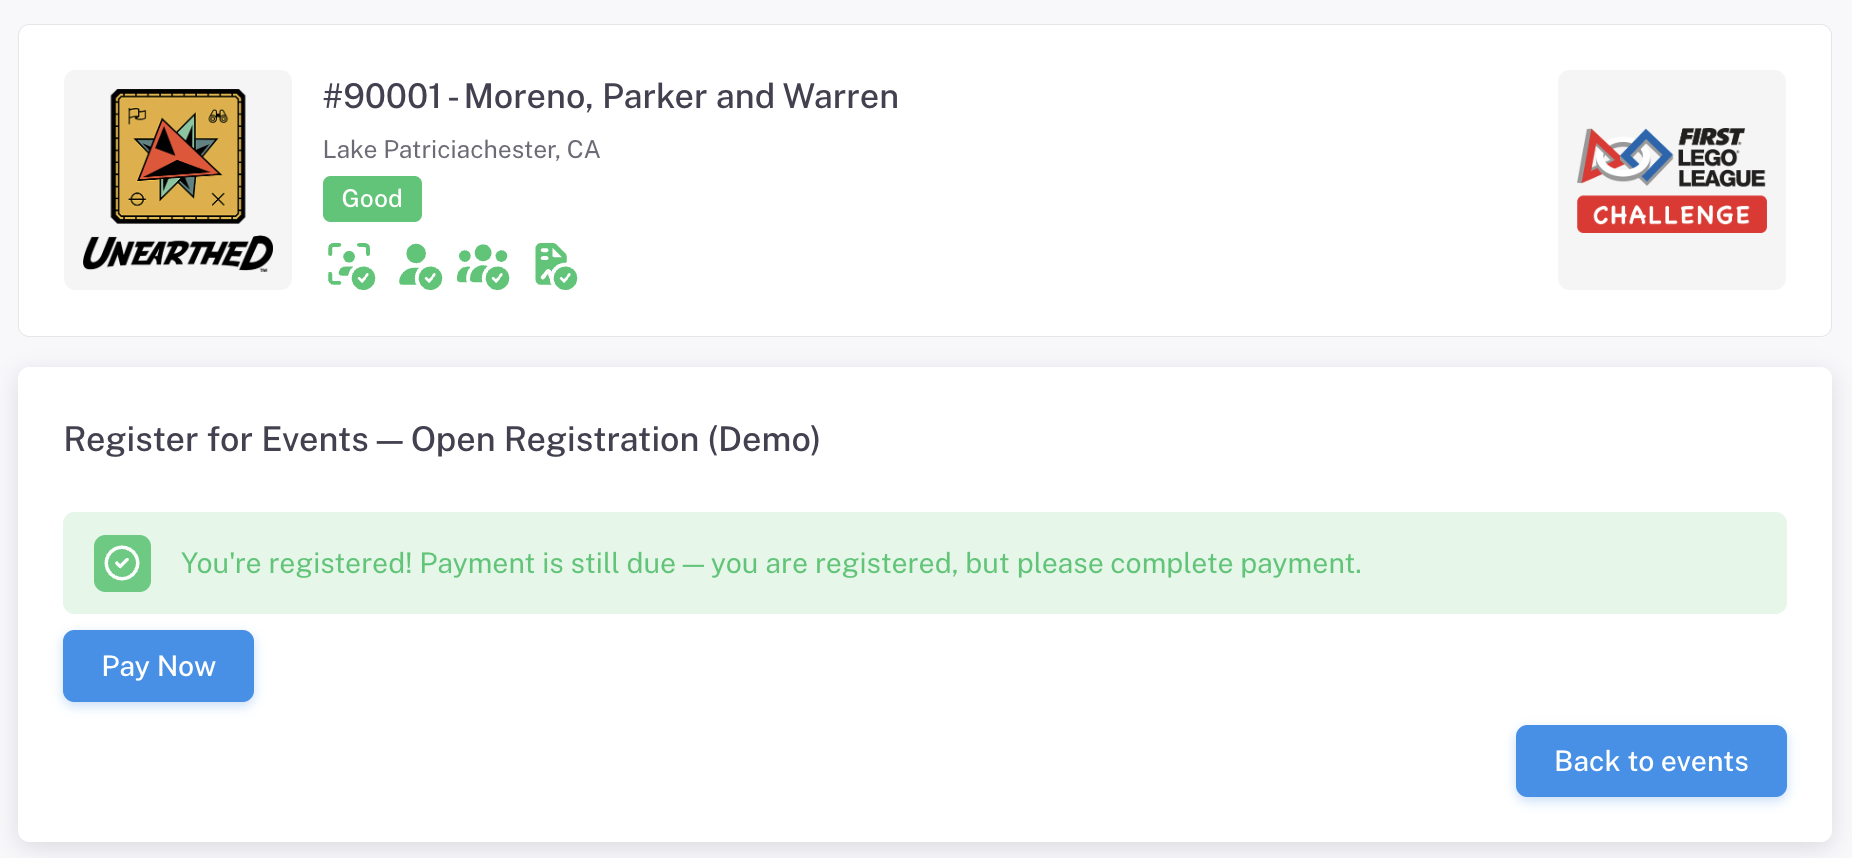
For preference submissions, the result is different — see the next section.
Capacity: Events have a maximum team capacity. Once an event is full it no longer appears as available for direct registration. Check the Teams tab on the event details page to see how many teams are currently registered versus the event capacity.
Preference Waves vs. Normal Registration
These are two different ways a region hands out places, and which one applies depends on the level. You can tell them apart by the button: Register for Events takes a place there and then, Submit Event Preferences puts you into a wave.
| Normal registration | Preference wave | |
|---|---|---|
| What submitting does | Takes a place immediately | Saves your ranked list; nothing else happens yet |
| When you find out | Within seconds, on screen | After the wave is processed, by notification |
| Can you change it afterwards | No — contact your region | Yes, re-submit as often as you like until the wave closes |
| Payment | Can block you from registering | Never blocks you from submitting |
The three times that matter
A wave has an opens, a closes and a processes time, and they mean different things to you:
- Before it opens — the Submit Event Preferences button is not there yet.
- Between opens and closes — submit and re-submit freely. The last version you save is the one that counts.
- After it closes — you can no longer change anything, but places have not been handed out yet.
- At processes — the system works through every team’s ranked list and creates the registrations. This is when you find out.
That gap between closing and processing is a window where there is nothing to do but wait. It is normal, and your Events tab stays empty until processing is done.
What happens at processing
Teams holding a reserved spot are placed first, then everyone else. For each team, the system walks down your ranked list and takes the first event that still has room. This is exactly why ranking more than one event matters — a one-item list whose event fills up leaves you with nothing.
Warning: Two things get a preference submission thrown out at processing instead of turned into a registration: your team is no longer in Good standing, or the level required payment in advance and it has not arrived. Either way you get a notification rather than a place. If you submit while out of compliance the screen warns you at the time — you have until the wave closes to put it right.