Profile & Email
For: All roles
Your account settings let you keep your personal information up to date, manage the email addresses on your account, and complete any required agreements. Navigate to Account Settings from the user menu in the top navigation bar. The page is organized into tabs: Profile, Agreements, Security, and Volunteer Profile.
Editing Your Profile
The Profile tab contains your basic account information. You can update the following fields:
- First Name and Last Name — how your name appears throughout the platform
- Pronouns — optional. Choose from He/Him, She/Her, They/Them, Ask me for my pronouns, or leave it as Not specified
- Month of Birth and Year of Birth — required for age verification
After making changes, click Submit Changes to save. Use the Reset button to discard any edits and return to your saved values.
Note: If you are a coach, the birth date you enter must put you at 13 or over; a younger date is rejected with “User Needs to be at least 13”.
Saving your profile is one of the actions that can ask you to re-verify your identity. If it does, a verification dialog appears, and your changes are saved automatically once you pass it — you do not need to re-enter anything. See Security.
Managing Email Addresses
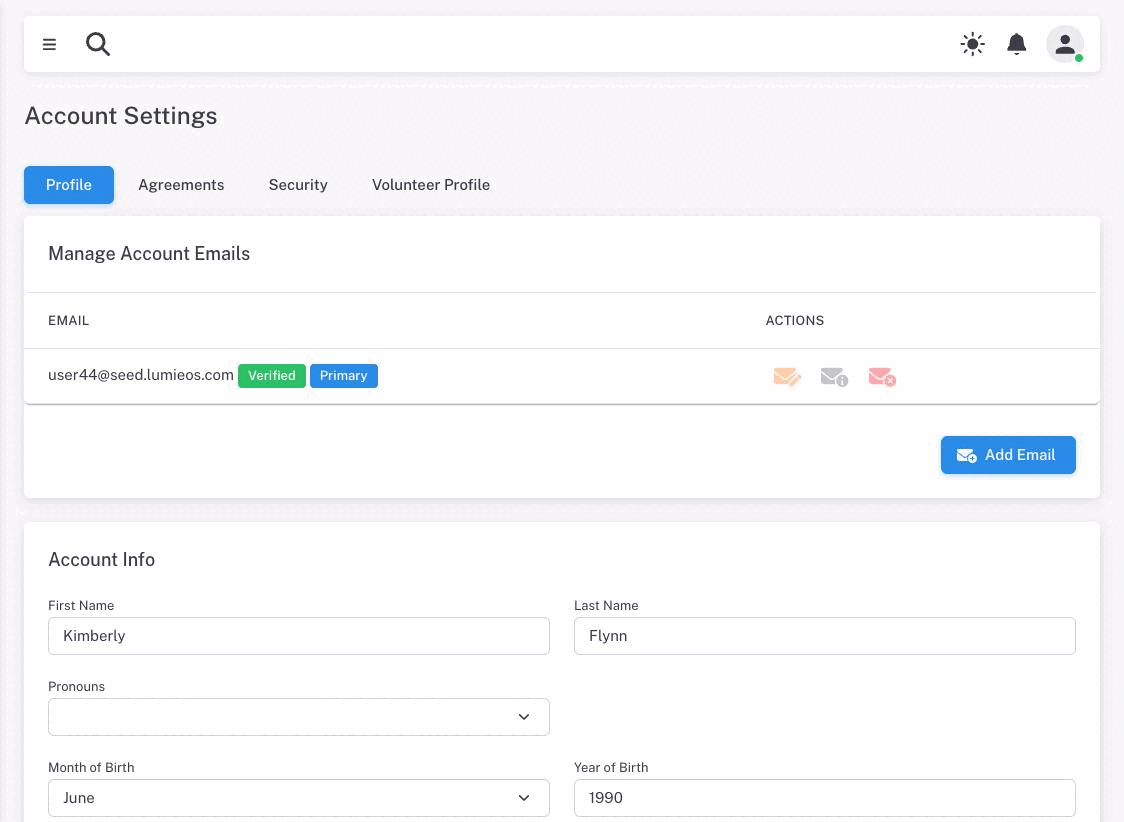
Your email addresses are shown at the top of the Profile tab. Each address shows its verification status (Verified or Not Verified) and whether it is your Primary email.
Adding an Email Address
- Click Add Email at the bottom of the email list.
- Enter the new address and click Save.
- Check your inbox for a verification email and click the link inside it.
You cannot add another email address until all existing addresses are verified. The Add Email button is disabled while any address is unverified.
Verifying an Email Address
When you add an address, a verification email is sent automatically. If you need to resend it, click the resend icon next to the unverified address. Once you click the link in the email, the address will be marked Verified.
Editing an Unverified Address
If you added an address with a typo, click the edit icon next to it to correct it. Editing is only available for addresses that have not yet been verified.
Setting a Primary Email Address
Your primary email is the address used for login magic links and system communications. To change which address is primary:
- Make sure the address you want to use is already verified.
- Click the Make Primary icon next to that address.
The current primary address cannot be deleted. To remove it, first set another verified address as primary.
Removing an Email Address
Click the delete icon next to any non-primary address to remove it. You cannot delete your primary email address.
How Email Matching Works
When you verify an email address, Lumieos automatically checks whether that address is associated with a team in the national robotics program database. If a match is found, you are connected to that team without any manual steps. This is how coaches and assistant coaches are linked to their teams when they first create an account.
Verifying all of your email addresses helps ensure you are connected to every team you are associated with.
Agreements
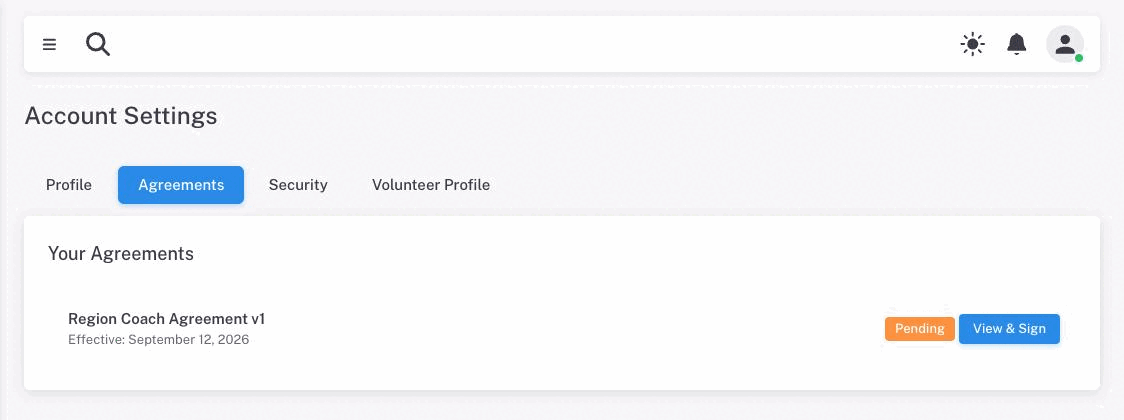
The Agreements tab lists any agreements your organization requires you to complete. These may include codes of conduct, consent forms, or other documents.
Each agreement shows:
- The agreement name and version number
- Its status: Pending, Complete, or Error
- The date it was signed (if complete)
- The signing method used
Signing an Agreement Electronically
- Click View & Sign next to a pending agreement.
- Read the agreement content in the dialog.
- Check the box to consent to electronic signing.
- Type your full legal name in the Signature field.
- Click I Accept.
Uploading a Paper Form
If a signed paper form is required or preferred, click Upload Signed Form in the signing dialog and select a PDF, JPG, or PNG file.
Signing via an External Tool
Some agreements may require signing through an external service (such as DocuSign). In that case, a Sign Online button will appear — click it to complete the process on the external site.
You can view a previously signed agreement at any time by clicking View next to it.
Volunteer Profile
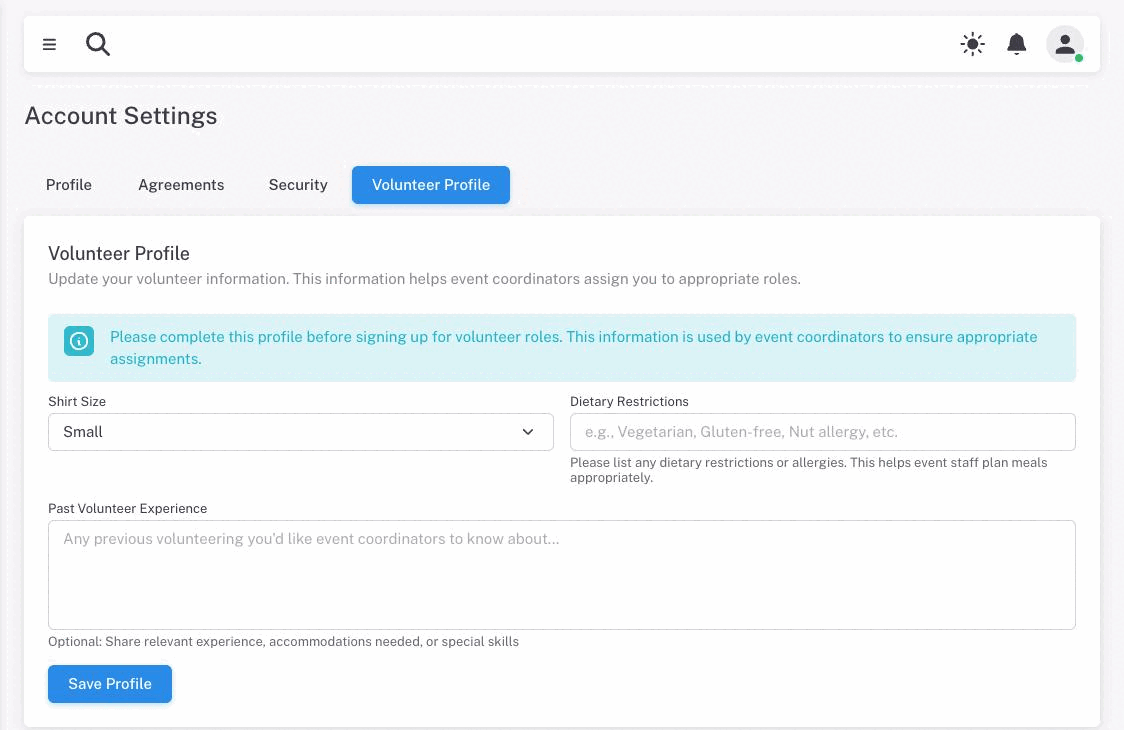
The Volunteer Profile tab is relevant to anyone who volunteers at events. This information helps event coordinators assign you to appropriate roles. You can fill in the following:
- Shirt Size — used for volunteer t-shirt orders
- Dietary Restrictions — any food allergies or dietary preferences, used for meal planning
- Past Volunteer Experience — relevant experience, accommodations you need, or special skills you want coordinators to know about
Some regions collect more:
The fields below appear only where your region has enabled the extended volunteer profile. Some regions also make them required before you can apply to volunteer.
- Cell Phone Number — the number coordinators can reach you on during an event
- Gender
- City — optional
- Parent/Guardian’s Name and Parent/Guardian’s Cell Phone — shown only to volunteers under 18
Click Save Profile when you are done. Complete this profile before signing up for any volunteer roles — where the extended fields are required, a missing one blocks the save and the message names which.
Team Affiliations
Your volunteer profile carries one list of the teams you are connected to — as a mentor, a parent, an alum, however. It is a single list shared everywhere it is needed: your volunteer profile, any event host application you make, and the screens where coordinators review them. You cannot give one answer in one place and a different answer in another.
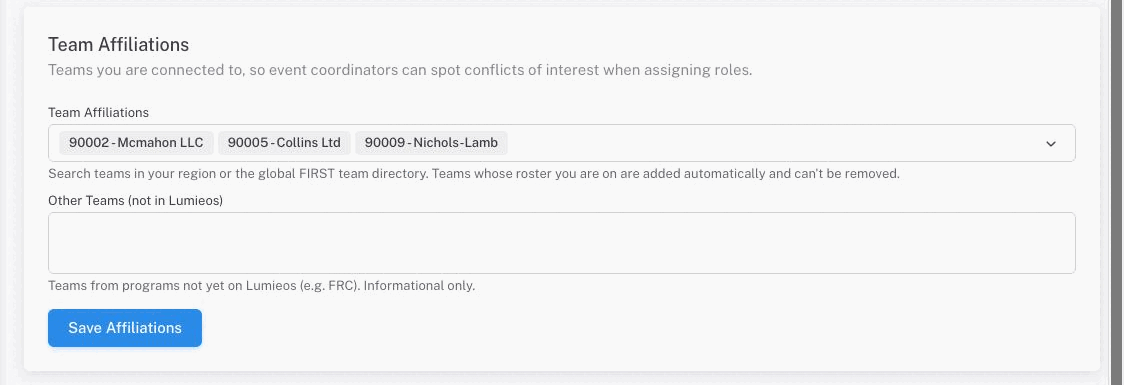
Add teams three ways:
- Teams in your region — pick from your region’s list.
- Any official FIRST team — search the full FTC and FRC directory worldwide. Results show the program, city and state so you can tell similarly numbered teams apart. Your region’s own teams are listed first.
- Anything else — a free-text box for a connection that is not a registered team.
Teams you are on the roster of are added for you. They appear automatically and cannot be removed while you are still on the roster, so a mentor never has to remember to declare their own team.
Why it matters: events use this list to flag a possible conflict of interest when you volunteer at an event where one of your teams is competing. It is a flag for the coordinator, not a block — see Volunteer Coordinator. Only teams picked from a real team list take part in that check; free-text entries never do.
You are asked to confirm this list once a year — see Signing Up to Volunteer. Until you do, new volunteer applications are blocked.
Tip: Confirming just means clicking Save Affiliations. If you genuinely have no team connections, saving the empty list is the confirmation — you do not need to add anything.