Event Host: Managing Commerce
For: Event Hosts
This page covers the Configuration and Invoices tabs in your event-manage area — available when your region has enabled host-collected commerce for an event you are hosting. In this mode, your organization collects registration payments directly from teams instead of the region collecting centrally.
Do You Have Access?
The Configuration and Invoices tabs only appear if both of the following are true:
- Your region has granted you the Manage Commerce permission for the specific event, and
- The event’s level payment configuration has been put into host-collected mode by your region.
If you don’t see these tabs under an event you manage, contact your region administrator — see Region Contacts.
Note: The registration fee is still set by your region — the Level Payment Configuration controls the amount. You control who teams pay and how, not how much.
Accessing Commerce
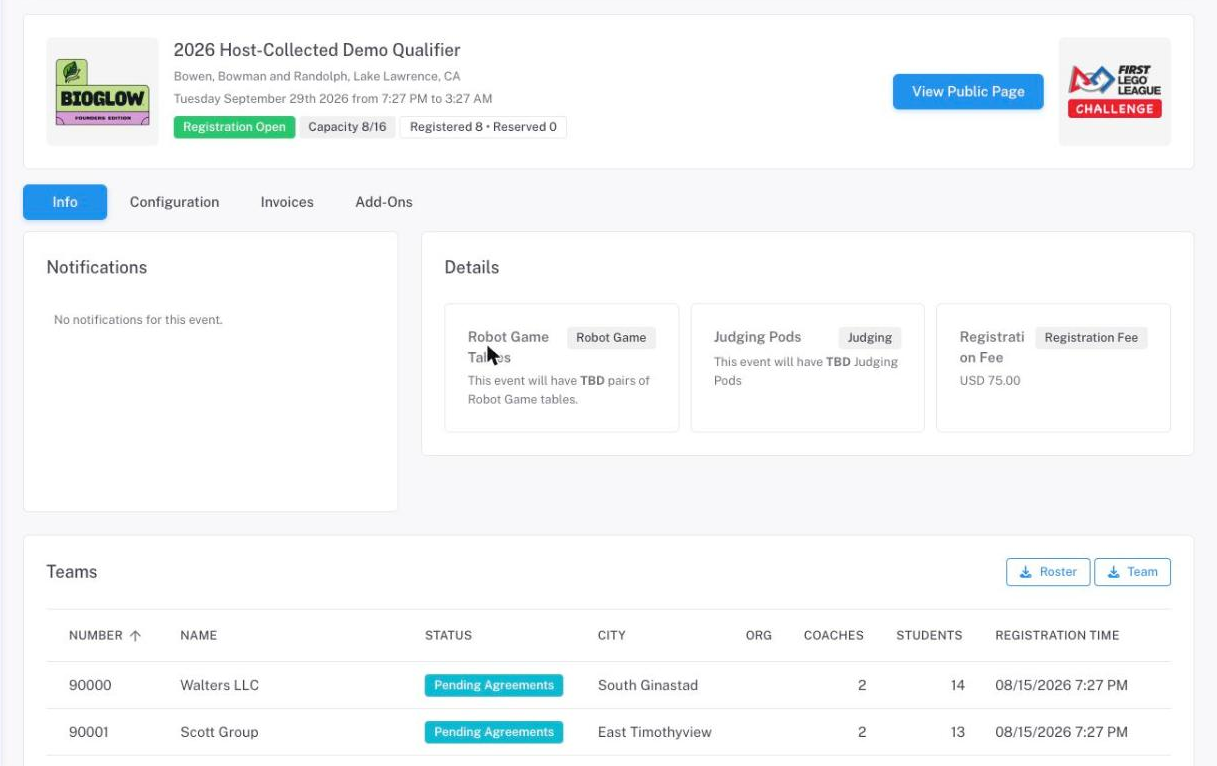
Navigate to Events → [Your Event] → Manage. Two top-level tabs handle host-collected commerce:
- Configuration — contains the Host Payment Setup card, where you configure your payee details, accepted payment methods, and invoice branding.
- Invoices — view and settle invoices teams owe your organization for this event.
Payment Setup
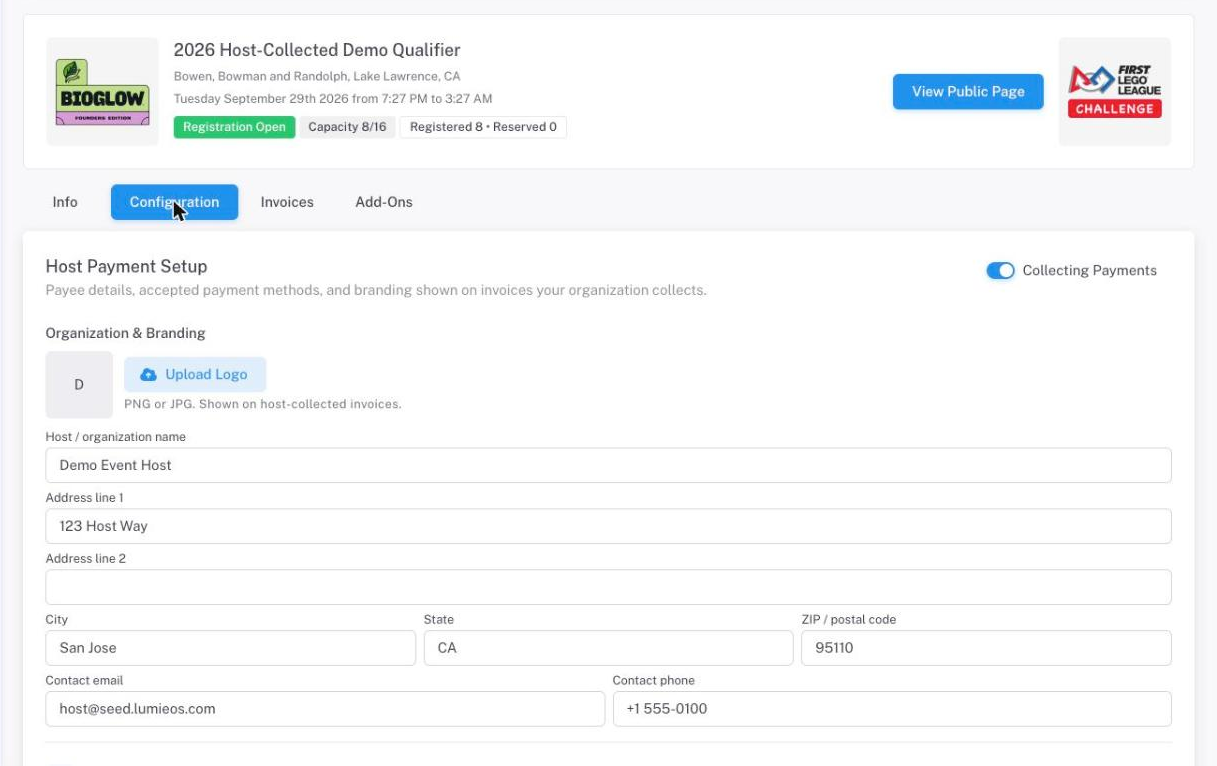
The Host Payment Setup card, on the Configuration tab, is where you set up everything teams need to pay you.
Turning On Collecting Payments
The Collecting Payments switch, in the card’s header, controls whether teams can see and use your payment methods. It’s off by default and stays off — greyed out — until setup is complete:
- Host information: host/organization name, contact email, address line 1, city, state, and ZIP.
- At least one fully-configured payment method: Paper (payable-to name and mailing address), EFT (transfer instructions), or Custom online portal (a portal URL).
While the switch is off and setup is incomplete, hover over it (tap on mobile) to see a tooltip listing exactly what’s still missing, grouped under “Host information” and “At least one payment method”. Once every requirement is met, the switch becomes clickable and you can turn on Collecting Payments.
Warning: If you later save a change that removes required information while you’re collecting — for example, clearing your contact email or disabling your only payment method — Lumieos automatically turns Collecting Payments off and shows a warning notification explaining why.
Organization & Branding
These details replace the region’s branding on any invoice collected through this configuration — they are what teams see when they view or print their invoice.
| Field | Description |
|---|---|
| Logo | Upload a PNG or JPG. Shown on host-collected invoices. |
| Host / organization name | Your organization’s display name — the payee identity shown on invoices. |
| Address line 1 / 2, City, State, ZIP | Your mailing/from-address, shown in the invoice header. |
| Contact email / phone | Shown on the invoice for teams to reach you with questions. |
Payment Methods
Turn on any combination of the following. At least one must be enabled before a team can pay you.
Paper (Check / Money Order)
| Field | Description |
|---|---|
| Checks payable to | The payee name to print on the check. |
| Mailing address | Where teams should mail payment. |
| Memo instructions | What to write in the memo line — for example, ask teams to include their team number. |
| Hide entity address on invoice header | Optional — hides your address from the invoice header if you’d rather it only appear in the payment instructions. |
EFT / Bank Transfer
| Field | Description |
|---|---|
| EFT / bank transfer instructions | Free text — bank/account details and any reference teams should include. |
A team paying by EFT uploads their own proof of payment on their invoice; you’ll reference it when you mark the invoice paid.
Custom Online Portal
| Field | Description |
|---|---|
| Portal URL | A link to your own external payment page (e.g. your organization’s existing online store or payment processor). |
| Instructions | Free text shown alongside the link. |
Scope: Host-collected mode supports these manual methods only. Integrated online card processing (a host’s own PayPal/Stripe/card checkout, auto-settled by Lumieos) is not yet available in this mode.
Click Save Payment Setup to apply your changes.
Invoices
The Invoices tab lists every invoice collected by your organization for this event, along with summary stats: Open Invoices, Paid Invoices, Total Outstanding, and Total Paid.
If you’re not currently collecting payments, a warning banner appears at the top of the tab:
- Setup incomplete — “Payment collection isn’t configured yet — teams can’t pay these invoices. Complete setup in the Configuration tab.”
- Setup complete but Collecting Payments is off — “Collecting Payments is turned off — teams can’t pay these invoices. Enable it in the Configuration tab.”
While either message is showing, teams also can’t create new invoices for this event — they’ll see “This event’s host isn’t accepting payments yet. Please try again later or contact the event host.” if they try to register and pay. Turn on Collecting Payments on the Configuration tab to clear the banner and let teams pay.
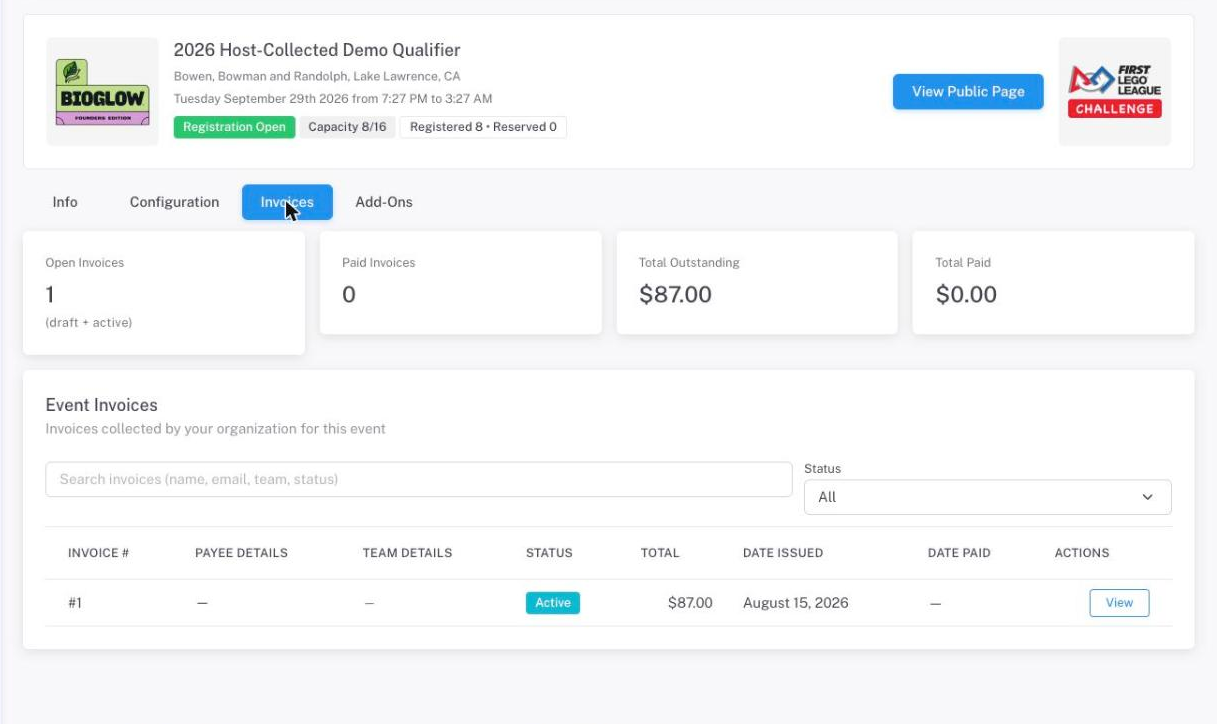
Use the search box and Status filter (Draft / Active / Paid / Cancelled) to find a specific invoice, then click View to open it.
Marking an Invoice Paid
Once a team has paid you off-platform, open their invoice and click Mark as Paid. This action is only available while the invoice is Active.
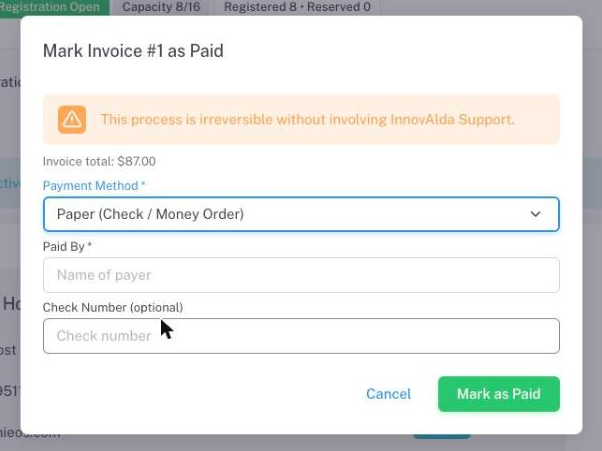
- Choose the Payment Method used — only methods you’ve enabled in Host Payment Setup appear here. If none are enabled, you’ll be prompted to enable at least one there first.
- Fill in the fields for that method:
| Method | Fields |
|---|---|
| Paper (Check / Money Order) | Paid By (required) — name of the payer. Check Number (optional). |
| EFT / Bank Transfer | Paid By (optional). Payment Reference (required) — the bank/EFT reference or proof-of-payment reference. |
| Custom Online Portal | Paid By (required). External Payment ID (required) — the transaction ID from your portal. |
- Click Mark as Paid.
Warning: Marking an invoice paid is irreversible without contacting InnovAlda Support. Double-check the amount and payer before confirming.
Once marked paid, the invoice status updates immediately and the team is credited for their registration.