Host Applications
Host Applications let any signed-in user propose to host a competition event for your region. You open the application per level, curate which questions it asks, and review submissions before deciding who runs your next event.
Access the Host Applications page from Region Management > Host Applications in the sidebar navigation.
Prerequisite: Viewing submissions requires Events — Can View (or higher) permission at the region level. Opening an intake, curating its questions, and deciding on submissions requires Events — Can Manage. See Permissions for details.
Opening an Intake
Each level has its own host-application intake — there is no region-wide on/off switch. Configure one from Configuration > Season > Host Application Intake, or click the host application intake settings shortcut in the Host Applications page header.
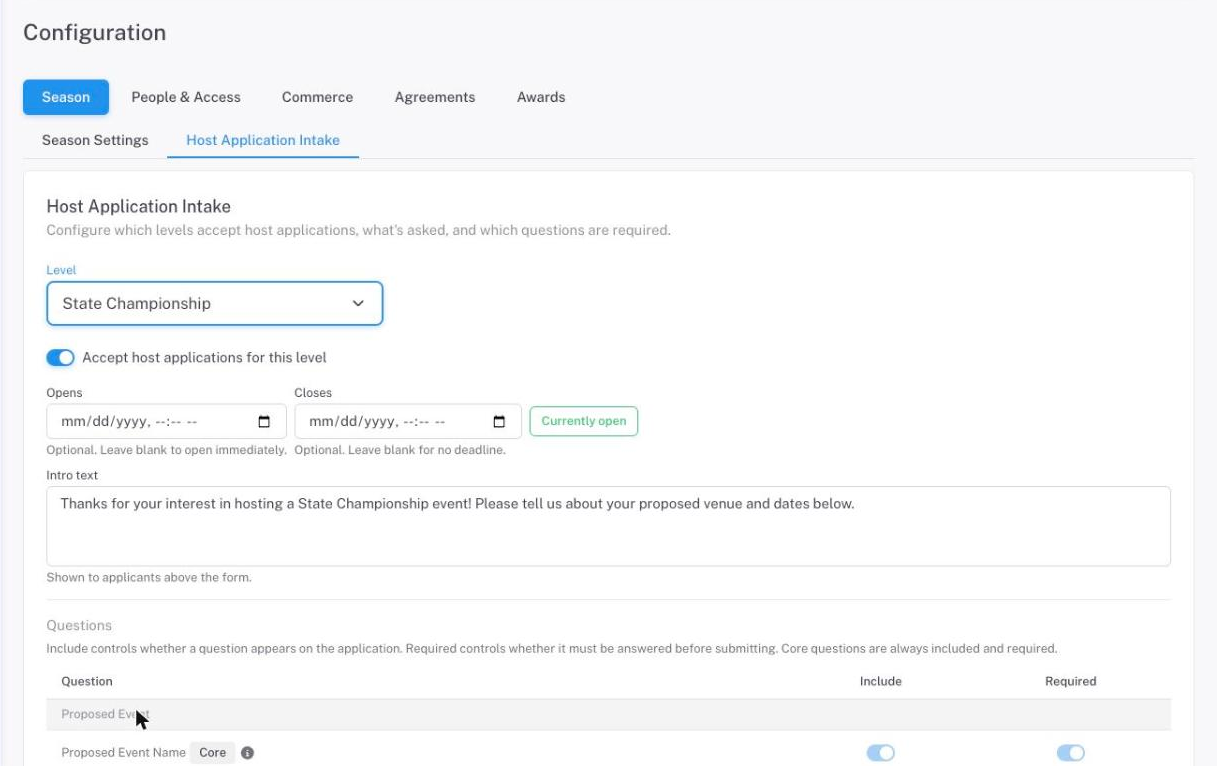
- Select the Level you want to open applications for.
- Turn on Accept host applications for this level.
- Optionally set an Opens and Closes date/time:
- Leave Opens blank to accept applications immediately.
- Leave Closes blank for no deadline. Applicants can keep submitting drafts, and existing applicants can still resubmit after changes are requested, for as long as the intake stays enabled.
- A Currently open / Currently closed chip shows the intake’s live status as you edit.
- Write an Intro text — shown to applicants above the form. Use it for anything specific to this level: expectations, deadlines, venue requirements, or a welcome message.
Click Save to apply your changes. Applicants only see a level in their Apply to Host list once its intake is enabled and currently open.
Curating the Form
Below the intake settings, the Questions table lists every question in the catalog, grouped by section (Proposed Event, Scheduling, Facility, Applicant Background, Additional Roles, Food, Reimbursement, General). For each question, two switches control what applicants see:
| Switch | Controls |
|---|---|
| Include | Whether the question appears on the application form at all. |
| Required | Whether the question must be answered before an applicant can submit. Only available once Include is on. |
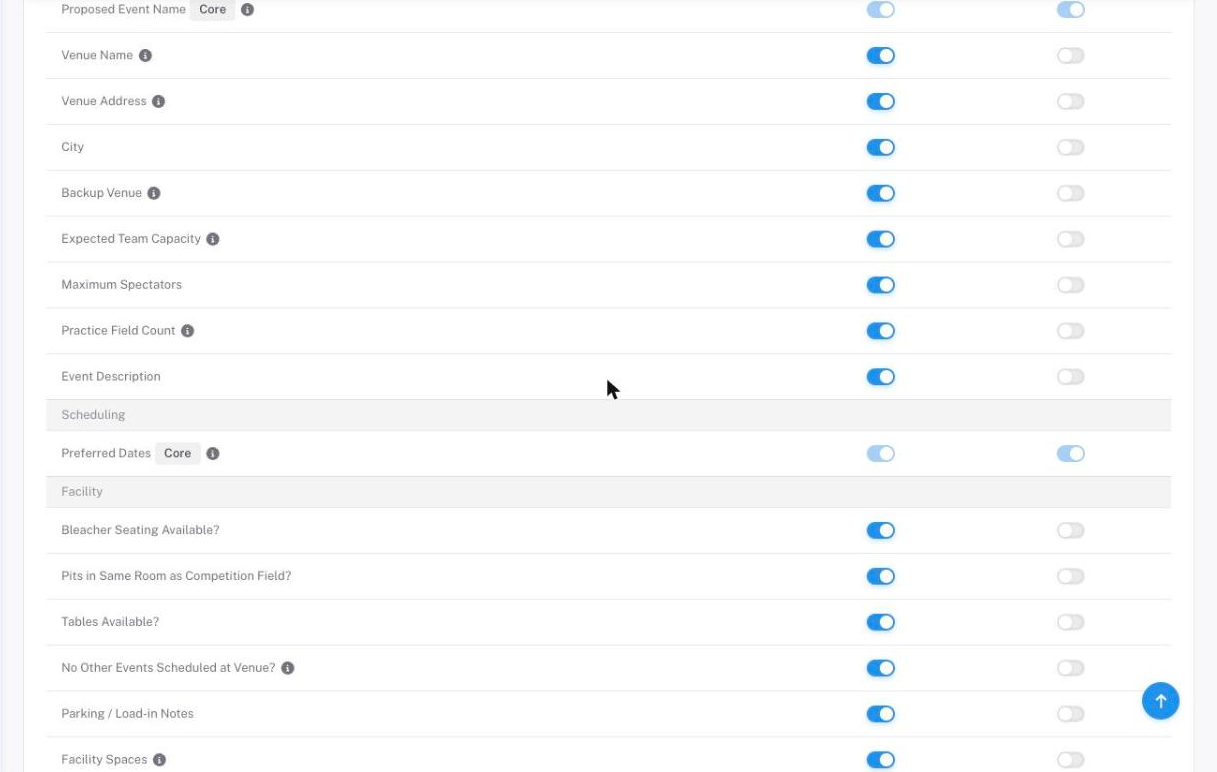
A few questions are marked Core and can’t be turned off — they’re always included and always required:
- Proposed Event Name
- Preferred Dates (the ranked weekend options)
- I confirm this application is accurate (the applicant’s accuracy acknowledgement)
Every other question is fully optional to include, and independently optional to require. There’s no limit on how many you include — turn on only what’s relevant to your process, or include everything for a thorough application. Click Save to apply your changes to the Questions table along with the rest of the intake settings.
Tip: If your region wants a different set of questions for different event types — for example, a shorter form for a small qualifier than for a championship — configure each level’s intake independently. Since curation is per level, running one intake per level (or per event type) is the way to get different forms without any extra setup.
Reviewing Submissions
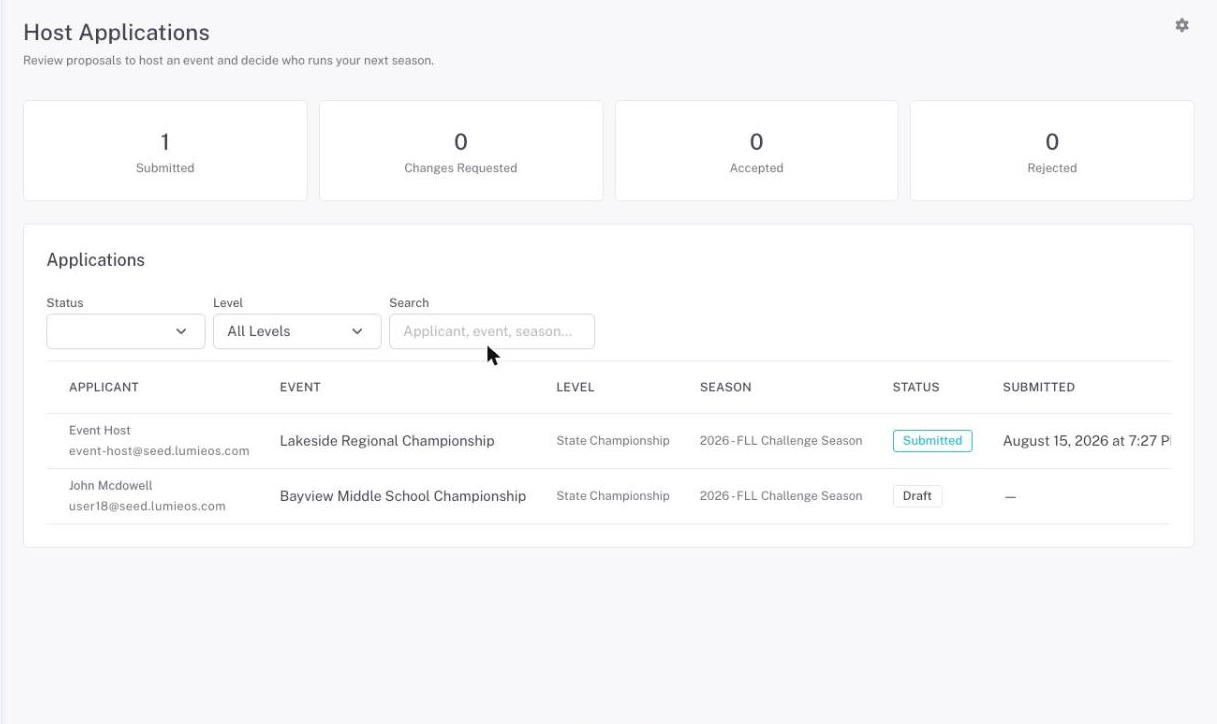
The Host Applications page lists every application submitted to your region, with summary cards and a filterable table.
Summary Cards
Four cards across the top show live counts by status — Submitted, Changes Requested, Accepted, and Rejected. (Draft applications aren’t shown here, since they still belong entirely to the applicant and aren’t yet part of your review queue.) Click a card to filter the table to that status; click it again to clear the filter.
Filters
Use the Status, Level, and Search controls above the table to narrow the list. Search matches against the applicant’s name and email, the proposed event name, the season, and the level.
Detail View
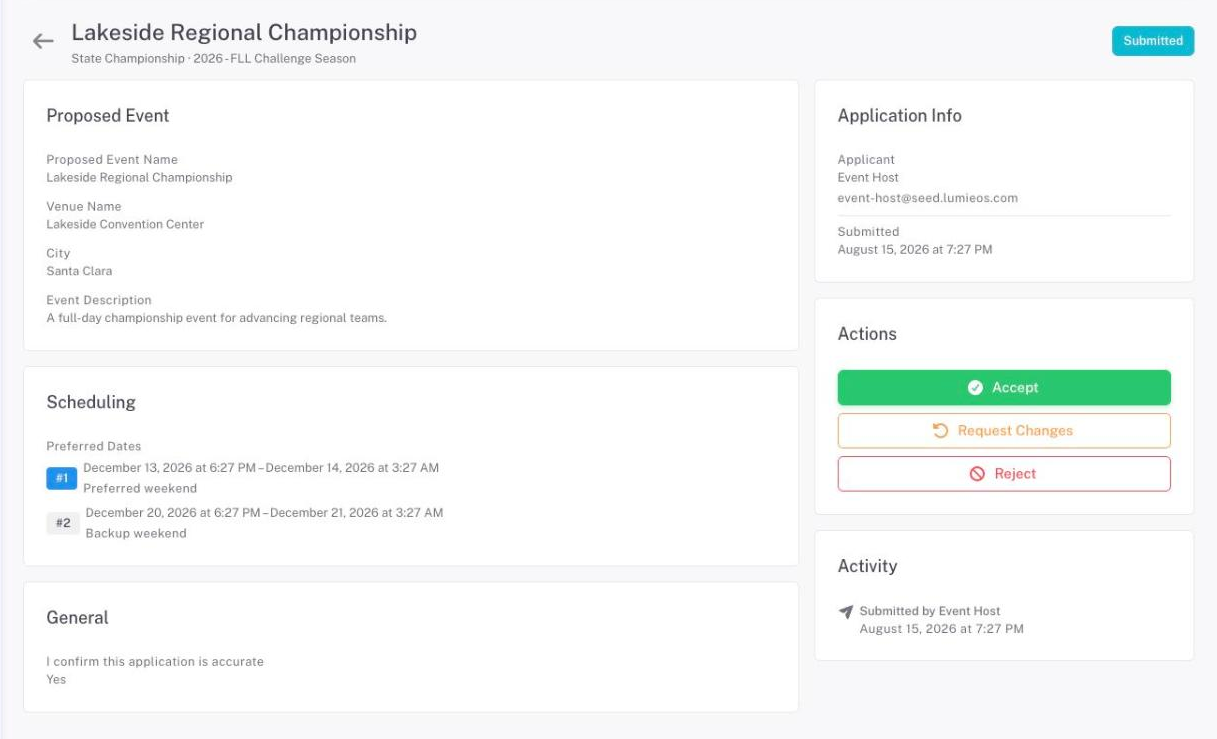
Click View on any row to open the full application. The left column renders every section the intake asked for — proposed event details, ranked date options, facility information, background, invited helpers, food plans, reimbursement details, and any attached files — showing only the questions that were actually part of that application. The right column shows applicant info, submission/decision timestamps, and the full activity timeline (every submission, resubmission, decision, and reviewer comment, in order).
Making Decisions
A submitted application can be decided from its detail view. Three actions are available while it’s in Submitted status:
Request Changes
Sends the application back to the applicant as Changes Requested. You must enter a comment explaining what needs updating — it’s shown to the applicant along with their notification, and appears on the application’s timeline. The applicant can revise their answers and resubmit; this works even if the intake’s window has since closed, since your region is still the one deciding the outcome.
Reject
Marks the application Rejected — a final decision for that application. A comment is required here too, and is shown to the applicant the same way.
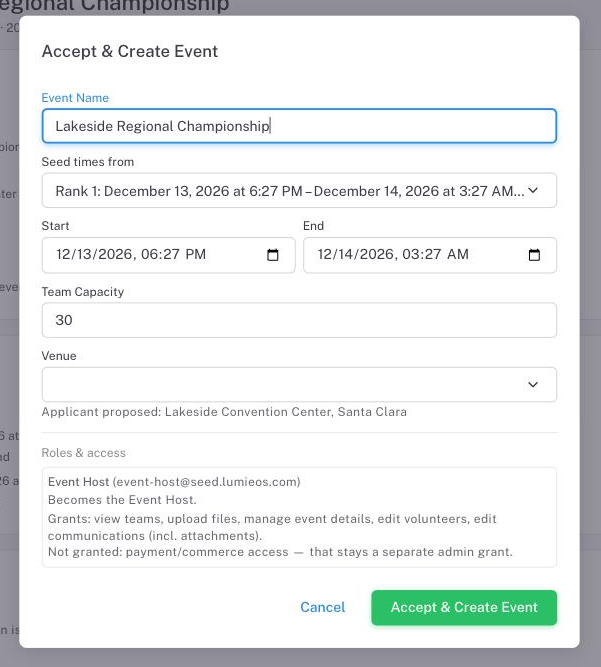
Accept
Marks the application Accepted and immediately:
- Creates a draft event under the level, using the applicant’s proposed name and capacity, seeded from their top-ranked (rank 1) date option. If they offered more than one date option, you can pick a different one from the Seed the event from dropdown before confirming.
- Grants the applicant host management access to that event, including the operational permissions needed to configure it — with the required host agreements generated for them automatically.
- Leaves any helpers the applicant listed under Additional Helpers as pending — they are not automatically added. The host assigns them access themselves from their event’s management area after acceptance.
Accept and Reject are terminal — once decided, an application cannot be reopened. Request Changes is the only path back to the applicant.
See the Event Host guide for what applicants see on their side of this process.